Ubuntu 26.04 LTS 上での GNOME Shell extention(以下、拡張)の開発テスト環境構築のメモです。思い立ったら JavaScript でさくっと好きなのつくれます。
まず、拡張のソースを配置するワークディレクトリ(ここでは ~/devel/gnome/punicot)を作成して metadata.json をいい感じにかいて配置します。
$ pwd
/home/hiromasa/devel/gnome/punicot
$ cat metadata.json
{
  "name": "Punicot",
  "description": "Animated desktop mascot — a draggable transparent overlay.",
  "uuid": "punicot@maple4ever.net",
  "version": 1,
  "shell-version": ["48", "50"],
  "url": "https://maple4ever.net/punicot"
}
また、エントリーポイントとなる extention.js も置いておきます。公式ドキュメント Imports and Modules 参照のこと。
$ cat extension.js
import * as Main from 'resource:///org/gnome/shell/ui/main.js';
import {Extension} from 'resource:///org/gnome/shell/extensions/extension.js';

export default class PunicotExtension extends Extension {
    enable() {
        // this._widget = new PunicotWidget(this);
        // Main.uiGroup.add_child(this._widget);
    }

    disable() {
        if (this._widget) {
            this._widget.destroy(); // fires 'destroy' → stopAnimation()
            this._widget = null;
        }
    }
}
この拡張を GNOME Shell に登録するために ~/.local/share/gnome-shell/extensions にワークディレクトリへのシンボリックシンクを metadata.json で指定した uuid 名で配置します。
$ pwd
/home/hiromasa/.local/share/gnome-shell/extensions
$ ln -s ~/devel/gnome/punicot/ $(pwd)/punicot@maple4ever.net
$ ls -laF | grep puni
lrwxrwxrwx 1 hiromasa hiromasa   35 Jul 11 17:25 punicot@maple4ever.net@ -> /home/hiromasa/devel/gnome/punicot/
ここでいっかい GNOME をログオフ、ログオンして extension-manager を開くと登録した拡張が現れるので有効にします。
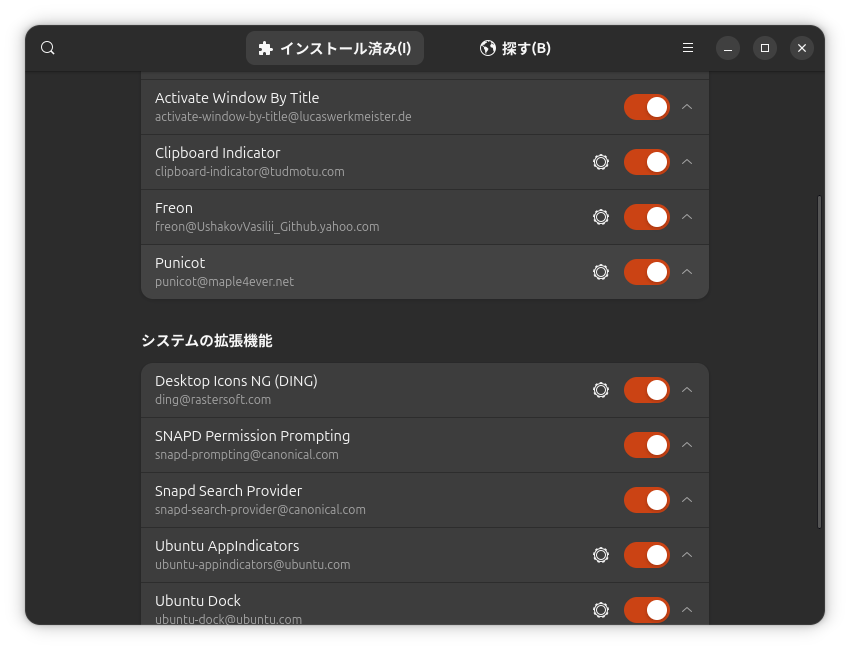
あとはワークディレクトリの extension.js や設定画面があれば prefs.js のソースをかいていけば OK です。この辺で git init して git add . && git commit -m "init" しておくのもいいかもです。
ソースファイル修正後の拡張の実行は、次のようにネストした GNOME Shell で進めるのが早そうです。(従来の --nested オプションがないので注意)
$ sudo apt install mutter-dev-bin # 入れないとネストで起動できない
$ dbus-run-session -- gnome-shell --devkit --wayland
動作を確認して nested ウインドウ内の右上のオレンジから終了して、ソース修正に戻るというイテレーションで製作できます。
以上、ぷにましゃでした。