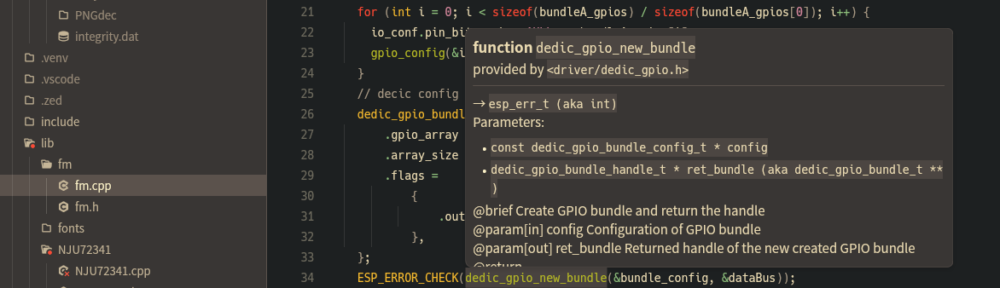
Rust と C/C++ プロジェクトで使う IDE を Zed に更新してみました。超高速で大変良い感じです…! 本記事では PlatformIO プロジェクトを Zed で扱う方法を記載します。...
Rust と C/C++ プロジェクトで使う IDE を Zed に更新してみました。超高速で大変良い感じです…! 本記事では PlatformIO プロジェクトを Zed で扱う方法を記載します。...
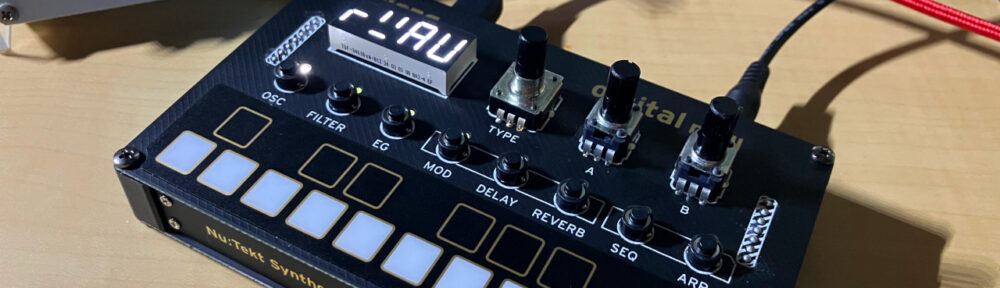
KORG の組み立てシンセキットである NTS-1 digital kit mkII は、C/C++ の SDK が公開されており、自分でプログラミングしたオシレータやエフェクタを本体に転送して動作させられる、とても面白いシンセサイザーです。 NTS-1 digital kit mkII - PROGRAMMABLE SYNTHESIZER KIT | KORG (Japan) 作って、繋いで、触って、手のひらサイズの強力なシンセサイザーが帰ってきた !! 進化したカスタマイズにより解き放たれるパワー かねてより、API が公開されていてカスタムソフトシンセが発音できるハードウェアが欲しいなと考えていましたので、購入して遊んでみました。...
WebAssembly Advent Calendar 2023 11 日目の記事です…! WebAssembly Micro Runtime (WAMR) は C言語で実装された WebAssembly ランタイムのひとつで、Bytecode Alliance が開発しています。 https://github.com/bytecodealliance/wasm-micro-runtime WebAssembly Micro Runtime (WAMR) is a lightweight standalone WebAssembly (Wasm) runtime with small footprint, high performance and highly configurable features for applications cross from embedded, IoT, edge to Trusted Execution Environment (TEE), smart contract, cloud native and so on. It includes a few parts as below: 引用にあるとおり、小さなフットプリントで動作することからマイコンでも WebAssembly を動作させることができ、おなじみ M5Stack などで採用されている ESP32 SoC もターゲットのひとつとなっています。...
これまで 8か月ほど調子良く動作していた MINISFORUM UM690 ミニ PC ですが、2023-9-13 くらいから Windows 11 使用中に真っ黒画面や画面の乱れの完全フリーズが数時間に一度発生するようになったのでメモ。 原因は不明でログとして。...

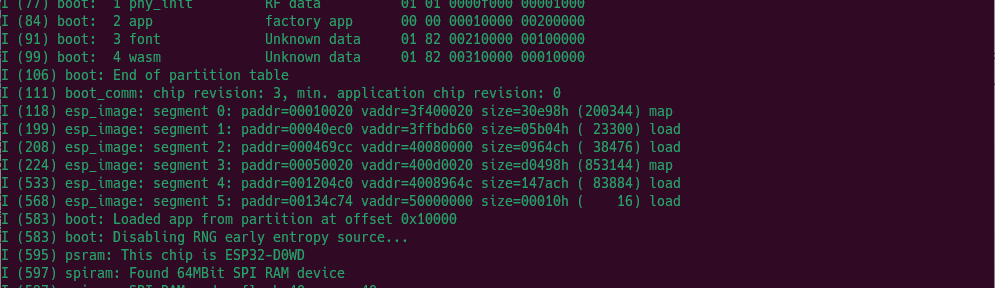
2023-07-11 の記事です。 RISC-V SBC である Sipeed Lichee Pi 4A の、新しい OS イメージ(& Linux カーネル)が公開されていましたので早速試してみました。...
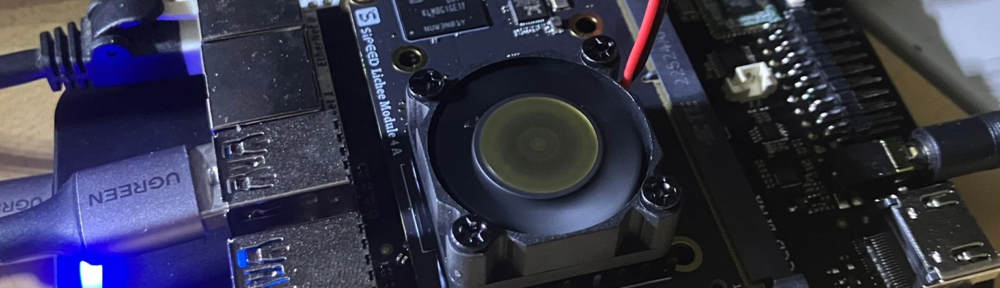
2023-05-12 の記事です。 Sipeed Lichee Pi 4A を購入しました…! プレオーダーして発売を楽しみにしていたハイスペック RISC-V シングルボードコンピュータです。...

M5Stack RCA Module に搭載されている I2S (PCM5102APWR) を、Rust で生成した PCM 波形で発音させたメモです。 波形の生成は libymfm.wasm として WebAssembly 向けに作成している Rust 製のシーケンサーとサウンドチップエミュレーションをそのまま esp-idf に持ってきて xtensa-esp32-espidf ビルドしています。...
Windows WSL2 の 1.0 版以降のカーネルでは、usbipd を経由することで Windows 側の USB 機器を IP 経由で参照することができます。 この動きを利用して、USB に接続した マイコン(M5Stack/USB-UART等々) に WSL2 Ubuntu 上のツールチェインから書き込みする手順を記載してみます。...
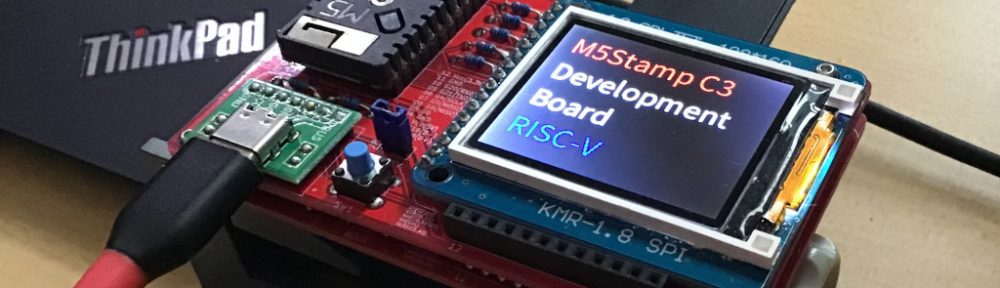
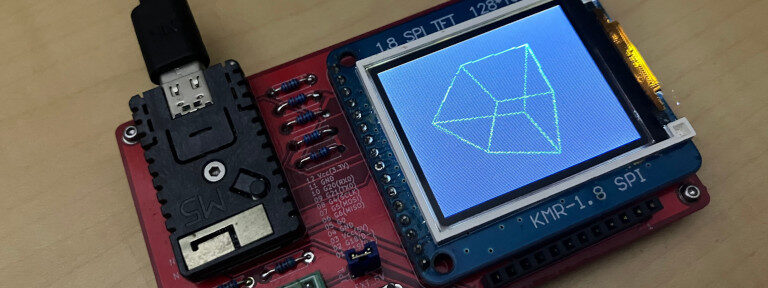
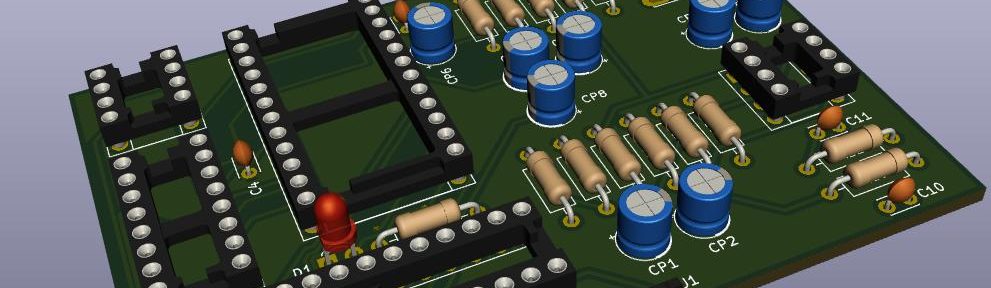
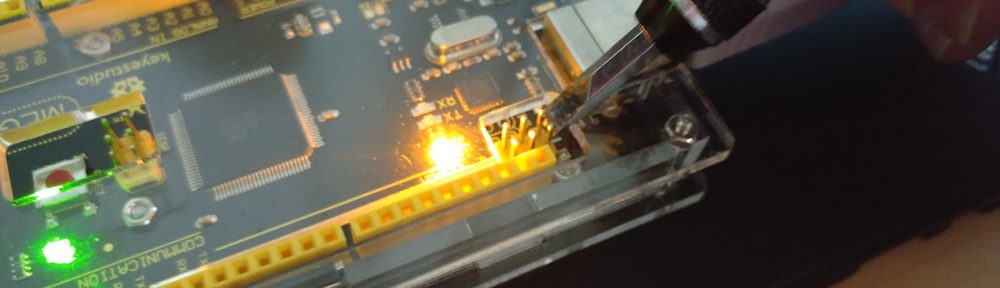
M5Stack から発売されている ESP32-C3(RISC-V) が搭載されているマイコン、M5Stamp C3 用の開発向け基板を製作してみました! 基板の特徴 JTAG デバッグのための外部 USB Type-C ポートの接続。 よく見かける KMR-1.8 とマークされた安価な LCD/SD の SPI 接続。...
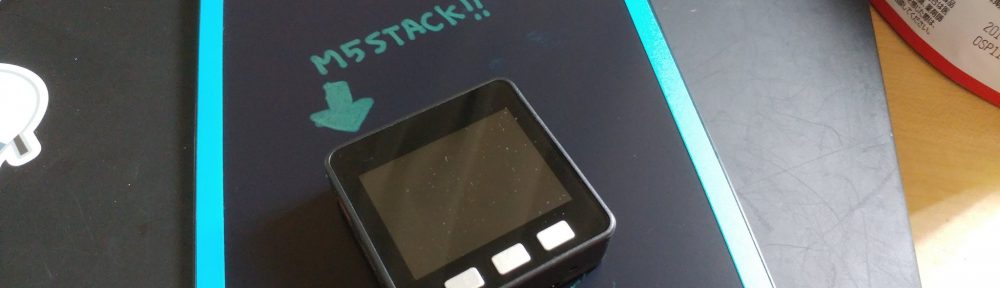
はじめに しばらく品切れが続いていました M5Stack Core2 を買うことができました。嬉しいです。...
twitter を眺めていましたらスイッチサイエンスさんから、かねてより興味があった RISC-V SoC のマイコンボードが発売されていましたので買ってみました。 LCD 付きで 4000円くらいなり。...
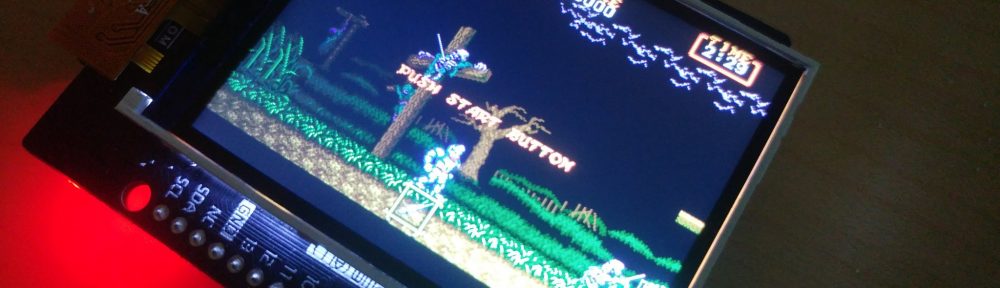
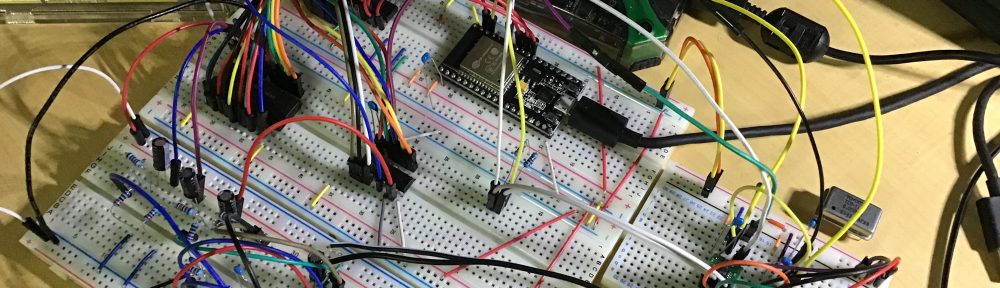
すごいぞメガドライブミニ!(2回目) というわけで「YM2612 + SN76489 メガドライブ音源を ESP32 で鳴らす (基板製作編)」です。この記事で使われているソースコードや結線などは github で公開しています。...
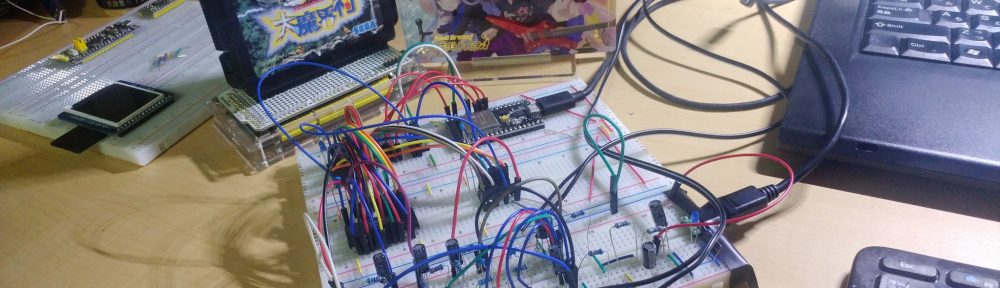
すごいぞメガドライブミニ!(収録ソフト2回目発表後) というわけで「YM2612 + SN76489 メガドライブ音源を ESP32 で鳴らす (クロックジェネレーター編)」です。この記事で使われているソースコードや結線などは github で公開しています。...
2020/1/19 更新 ESP32/M5Stack 開発環境構成の整理がてら構築手順をまとめてみました。Arduino IDE は使わずに VS Code でプログラムがかけるところまで書いてみます。...
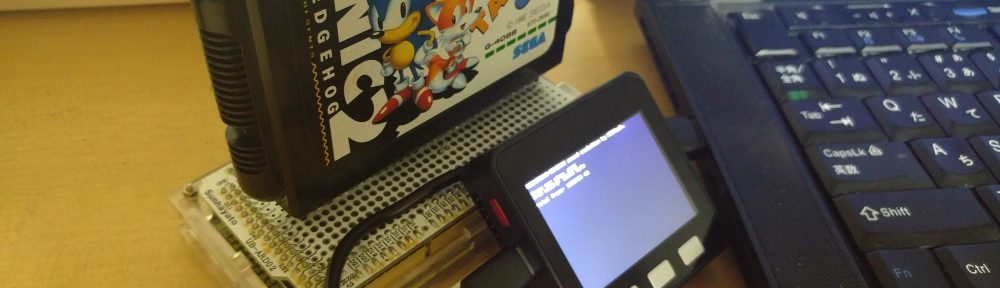
メガドライブのゲームミュージックをどうしても今再び実チップで鳴らしてみたい…。DNA がそうしろと言っているのだからしょうがない。...
勉強会で見せていただいて気になっていた M5Stack を買ってみました。 :) 内蔵スピーカーもついていますので hello world がてら、 PSG 音源をエミュレーションしてみようと始めたところ、なかなか鳴ってくれなくて苦労しました… https://youtu.be/dunNtkFS8gc 「エンディングI/SORCERIAN/Copyright© Nihon Falcom Corporation」 追記。...

1990年代の多くのアーケードゲーム機に搭載されていた音源チップ YAMAHA YM2151 を Arduino からこの手でどうしても発声させてみたい。 電子工作を始めて Lチカもそこそこに製作を始めた"未来ガジェット"のひとつです。...
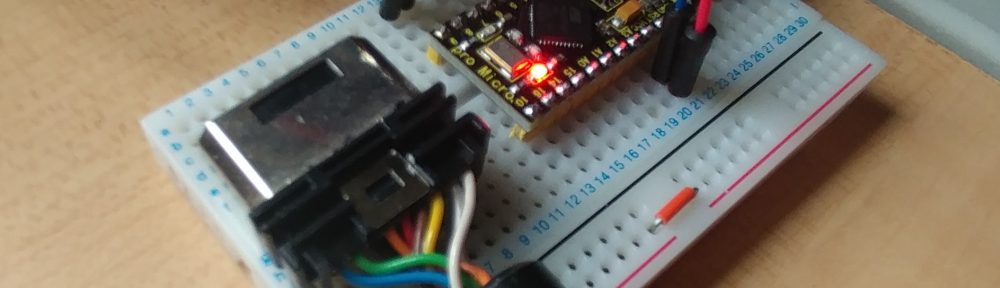
Arduino Pro Micro の勉強も兼ねまして、セガサターンのバーチャスティックを USB HID 化して PC に接続できるようにしてみました。 使いました Arduino Pro Micro 互換機はこちらです。...
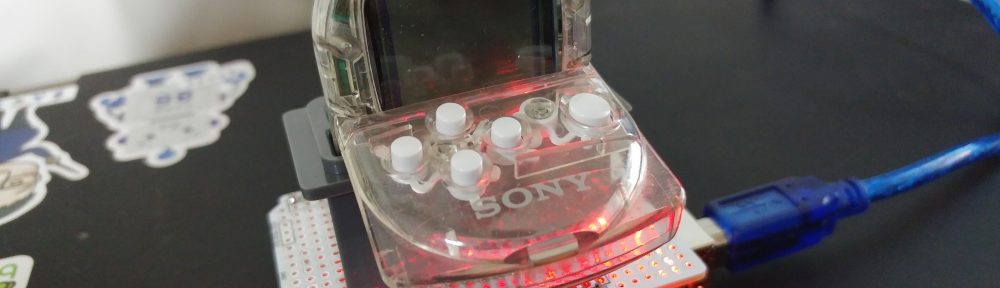
初代プレイステーションと連携して動く 1999年発売の携帯ゲーム機 PocketStation(ポケステ) をお友達が発掘してお借りすることができたので、当時流行っていた、ポケステをゲーム機として使わずに ARM マイコンとして遊ぶプレイを蘇らせてみました。 :P さすがにこれだけ年数が経過すると解説しているサイトさんも消え始めていていますので、2018 年版ポケステ・Hello World の手順を書いてみたいと思います。...
Windows 版の dfu-programmer で Arduino UNO の ATmega16U2 に書き込む方法をいつも忘れて調べてしまうので、メモです。 Arduino UNO などについている ATmega16U2 にカスタムファームを書き込んであげることで、Arduino を USB-MIDI や HID デバイスにすることができます。...
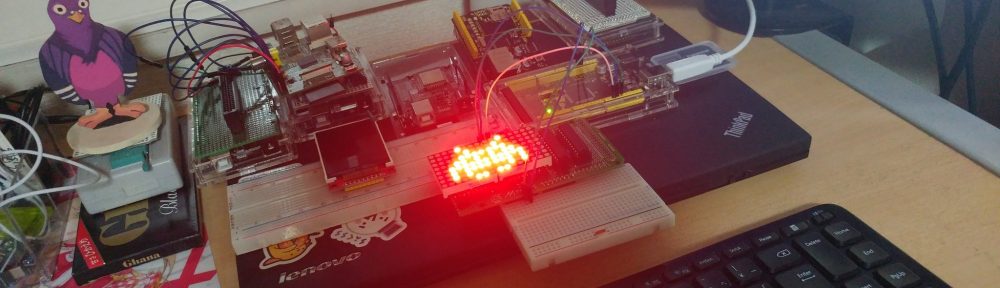
手持ちしていました 1088AS 8x8 matrix LED とコントローラー MAX7219 の DIG/SEG 配線にちょっと手こずりましたので備忘録です。最終的に出来上がったシールドは MIDI と接続してみました。...
Visual Studio Code Advent Calendar 2017 の 13日目の記事です。 :) 昨日の「Visual Studio Code の PHP 言語サポート vscode-php-intellisense 2017年版」に続きまして今日は VS Code と Arduino による電子工作です。...