Xbox Series X|S には Quick Resume が備わり、高速にゲームを切り替えられるので非常に便利ですが、時折ゲームを完全に終了したくなることがあります。(購入したダウンロードコンテンツを強制で再読み込みさせたい時など)
というわけで、次の方法でゲームを終了できます。
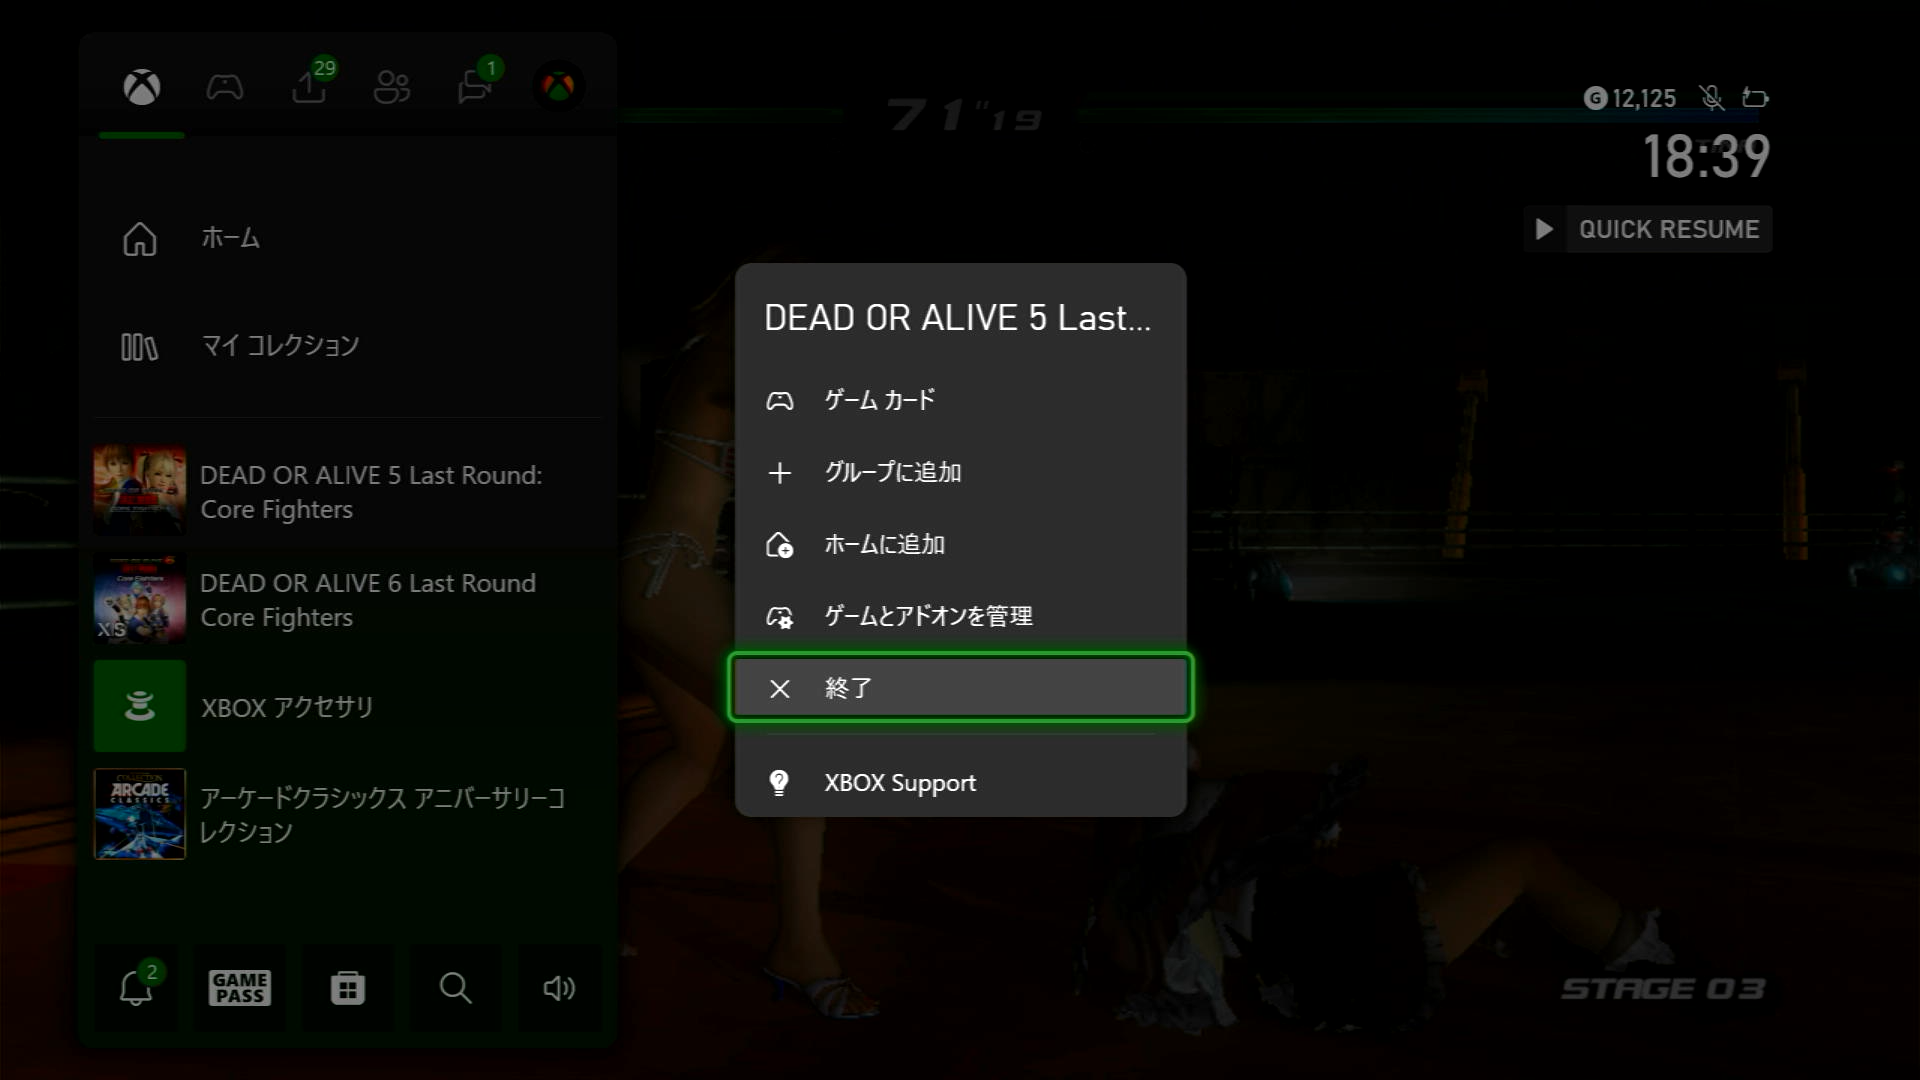
- コントローラ・しいたけ(Xbox)ボタンを押してメニューを起動
- 終了したいゲームにカーソルを合わせる
- コントローラ・☰(Menu)ボタンを押下して「終了」
やる前にセーブを忘れず📥️
Xbox Series X|S には Quick Resume が備わり、高速にゲームを切り替えられるので非常に便利ですが、時折ゲームを完全に終了したくなることがあります。(購入したダウンロードコンテンツを強制で再読み込みさせたい時など)
というわけで、次の方法でゲームを終了できます。
やる前にセーブを忘れず📥️
Ubuntu 26.04 LTS 上での GNOME Shell extention(以下、拡張)の開発テスト環境構築のメモです。思い立ったら JavaScript でさくっと好きなのつくれます。
まず、拡張のソースを配置するワークディレクトリ(ここでは ~/devel/gnome/punicot)を作成して metadata.json をいい感じにかいて配置します。
$ pwd
/home/hiromasa/devel/gnome/punicot
$ cat metadata.json
{
  "name": "Punicot",
  "description": "Animated desktop mascot — a draggable transparent overlay.",
  "uuid": "punicot@maple4ever.net",
  "version": 1,
  "shell-version": ["48", "50"],
  "url": "https://maple4ever.net/punicot"
}
また、エントリーポイントとなる extention.js も置いておきます。公式ドキュメント Imports and Modules 参照のこと。
$ cat extension.js
import * as Main from 'resource:///org/gnome/shell/ui/main.js';
import {Extension} from 'resource:///org/gnome/shell/extensions/extension.js';

export default class PunicotExtension extends Extension {
    enable() {
        // this._widget = new PunicotWidget(this);
        // Main.uiGroup.add_child(this._widget);
    }

    disable() {
        if (this._widget) {
            this._widget.destroy(); // fires 'destroy' → stopAnimation()
            this._widget = null;
        }
    }
}
この拡張を GNOME Shell に登録するために ~/.local/share/gnome-shell/extensions にワークディレクトリへのシンボリックシンクを metadata.json で指定した uuid 名で配置します。
$ pwd
/home/hiromasa/.local/share/gnome-shell/extensions
$ ln -s ~/devel/gnome/punicot/ $(pwd)/punicot@maple4ever.net
$ ls -laF | grep puni
lrwxrwxrwx 1 hiromasa hiromasa   35 Jul 11 17:25 punicot@maple4ever.net@ -> /home/hiromasa/devel/gnome/punicot/
ここでいっかい GNOME をログオフ、ログオンして extension-manager を開くと登録した拡張が現れるので有効にします。
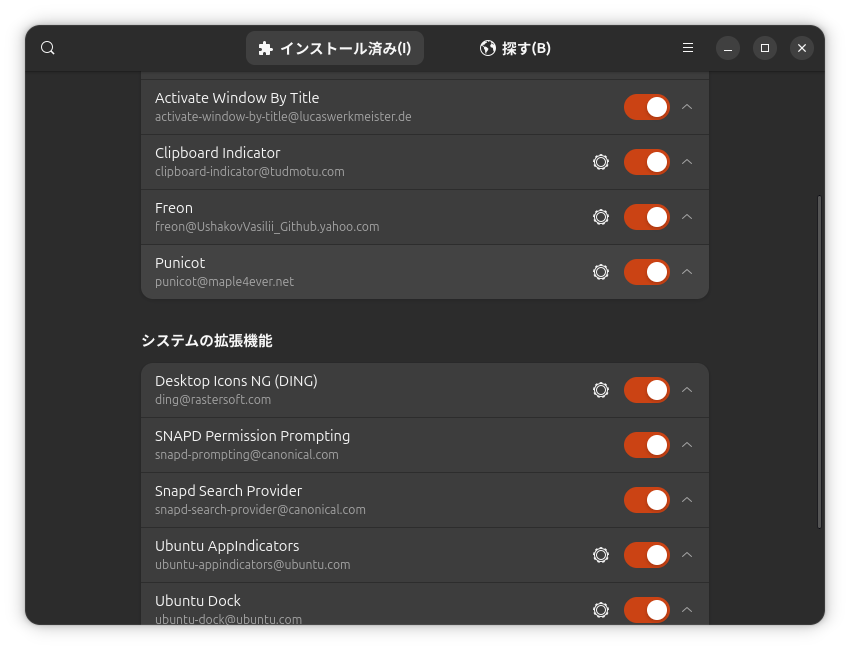
あとはワークディレクトリの extension.js や設定画面があれば prefs.js のソースをかいていけば OK です。この辺で git init して git add . && git commit -m "init" しておくのもいいかもです。
ソースファイル修正後の拡張の実行は、次のようにネストした GNOME Shell で進めるのが早そうです。(従来の --nested オプションがないので注意)
$ sudo apt install mutter-dev-bin # 入れないとネストで起動できない
$ dbus-run-session -- gnome-shell --devkit --wayland
動作を確認して nested ウインドウ内の右上のオレンジから終了して、ソース修正に戻るというイテレーションで製作できます。
以上、ぷにましゃでした。
Ubuntu 26.04 に採用されている Linux kernel 7.0 では、Wine や Proton といった Windows API 互換レイヤーの性能向上のために準備された /dev/ntsync を使うことができます。
というわけで Ubuntu 版 Steam クライアント(Proton) に ntsync 使わせると Windows ゲーム実行のフレームレートや安定性が向上するはず…という設定メモです。
まずは Steam クライアントを導入します。どうも snap 版だと権限の関係かうまく ntsync を使ってくれなかったので Valve Steam repository の公式 PPA より deb 版を導入。
$ sudo dpkg --add-architecture i386
$ sudo apt update
$ sudo curl -fsSLo /usr/share/keyrings/steam.gpg https://repo.steampowered.com/steam/archive/stable/steam.gpg
$ sudo chmod 0644 /usr/share/keyrings/steam.gpg
$ printf '%s\n' \
'Types: deb' \
'URIs: https://repo.steampowered.com/steam/' \
'Suites: stable' \
'Components: steam' \
'Architectures: amd64 i386' \
'Signed-By: /usr/share/keyrings/steam.gpg' | sudo tee /etc/apt/sources.list.d/steam.sources >/dev/null
$ sudo apt update
$ sudo apt install steam-launcher
ここでいったん Steam クライアントを起動して初期設定を走らせゲームの起動確認をした後に、 .bashrc に以下の環境変数を追加してから、(Steam の全プロセスが確実に落ちるという意味合いで)OS ごと再起動。
export PROTON_USE_NTSYNC=1
OS が起動してきたら、いよいよ ntsync カーネルモジュールをロードします。(Ubuntu 26.04 の標準構成では ntsync は自動ロードされない)
$ lsmod | grep ntsync
$ sudo modprobe ntsync
$ lsmod | grep ntsync
ntsync
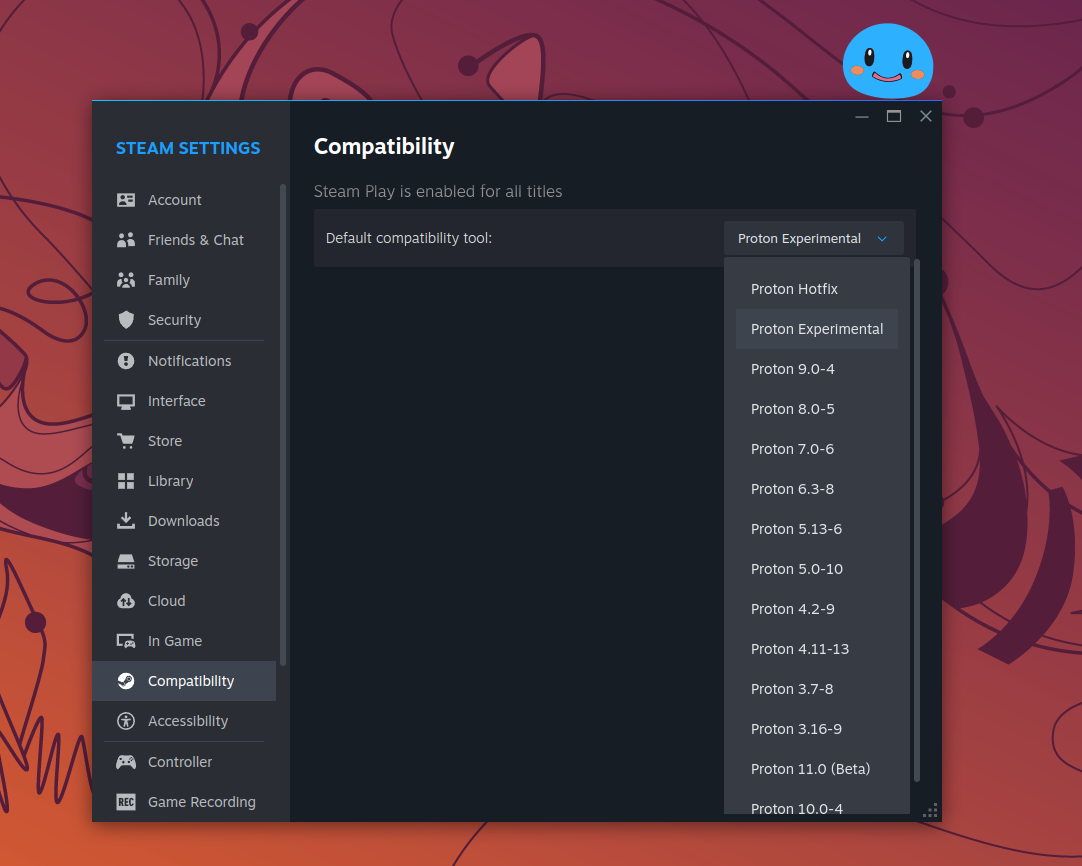
できたら、Steam クライアントを起動し Compatibility が Proton Experimental(もしくは Proton 11 以上) になっていることを確認後、試したいゲームを起動。
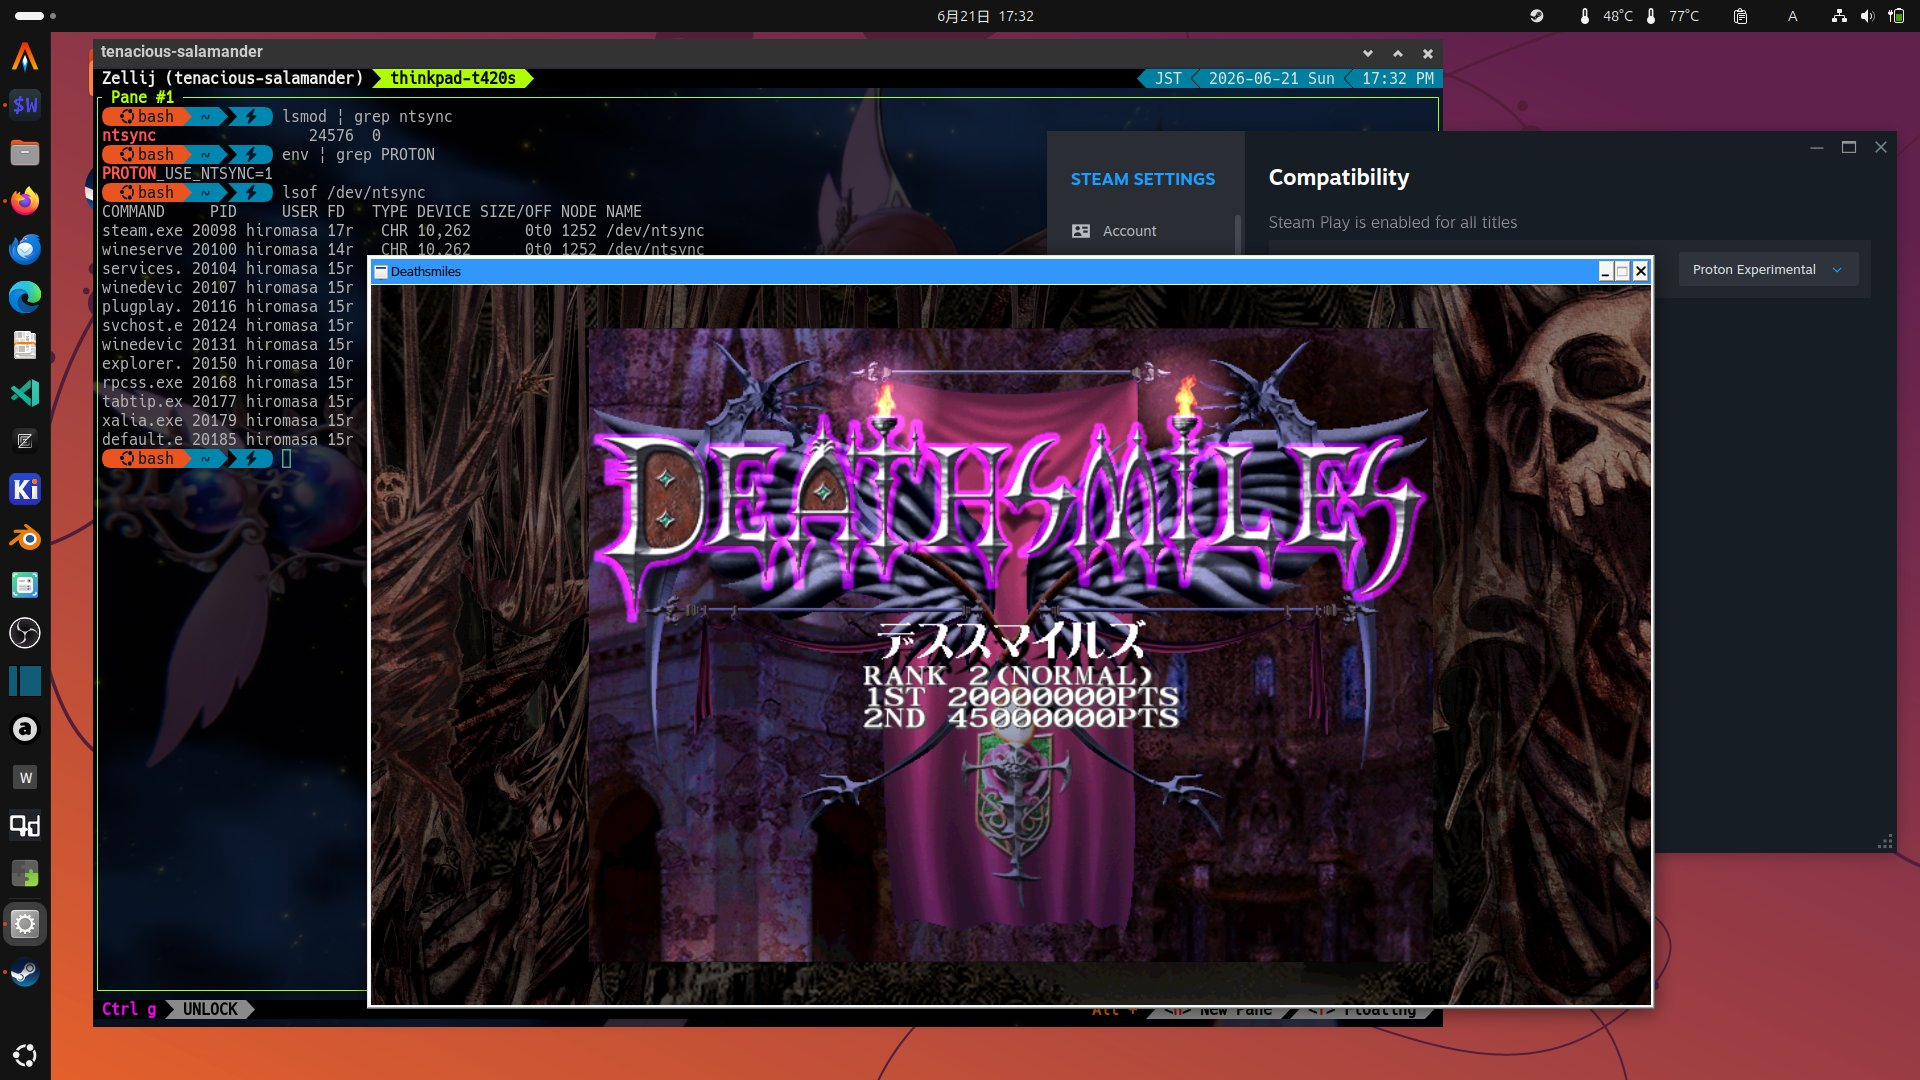
ゲームが起動したら ntsync が使われているか次のコマンドで確認できます。ntsync が使われていないケースでは何も出力されません。
$ lsof /dev/ntsync
COMMAND     PID     USER FD   TYPE DEVICE SIZE/OFF NODE NAME
steam.exe 20098 hiromasa 17r   CHR 10,262      0t0 1252 /dev/ntsync
wineserve 20100 hiromasa 14r   CHR 10,262      0t0 1252 /dev/ntsync
services. 20104 hiromasa 15r   CHR 10,262      0t0 1252 /dev/ntsync
winedevic 20107 hiromasa 15r   CHR 10,262      0t0 1252 /dev/ntsync
plugplay. 20116 hiromasa 15r   CHR 10,262      0t0 1252 /dev/ntsync
svchost.e 20124 hiromasa 15r   CHR 10,262      0t0 1252 /dev/ntsync
winedevic 20131 hiromasa 15r   CHR 10,262      0t0 1252 /dev/ntsync
explorer. 20150 hiromasa 10r   CHR 10,262      0t0 1252 /dev/ntsync
rpcss.exe 20168 hiromasa 15r   CHR 10,262      0t0 1252 /dev/ntsync
tabtip.ex 20177 hiromasa 15r   CHR 10,262      0t0 1252 /dev/ntsync
xalia.exe 20179 hiromasa 15r   CHR 10,262      0t0 1252 /dev/ntsync
default.e 20185 hiromasa 15r   CHR 10,262      0t0 1252 /dev/ntsync
ゲームによっては相当フレームレートが伸びるとのことなので、環境変数設定やモジュールのアンロードなどで切り替えてベンチマークしてみると良いかもしれません。
よい結果が得られましたら ntsync を自動ロードするように Ubuntu を構成します。
echo "ntsync" | sudo tee /etc/modules-load.d/ntsync.conf
がってん🦸️