2023-07-11 の記事です。
RISC-V SBC である Sipeed Lichee Pi 4A の、新しい OS イメージ(& Linux カーネル)が公開されていましたので早速試してみました。
なお、自分が使っている LPi 4A のハードウェアは 2023-07 に発売になったリリース版ではなく 2023-05 発売のベータ版です。動作が違う部分があるかもなのでご注意ください。
revyos 編
Official Sipeed image としてリリースされている Debian sid ベースのイメージです。Linux カーネルなどは revyos | thead-kernel という名前のリポジトリでホストされています。この記事では revyos kernel と呼ぶことにします。
The image for the LicheePi 4A is updated irregularly. The initial image may not be stable, or it may not be able to fully utilize the performance of the TH1520. Please follow the steps below to get the latest image.
Mega Cloud Storage:click me
LPI4A_20230706.zip
2023-07-06 版では、試したところ以前は動作しなかった Vulkan が動作するようになっています。
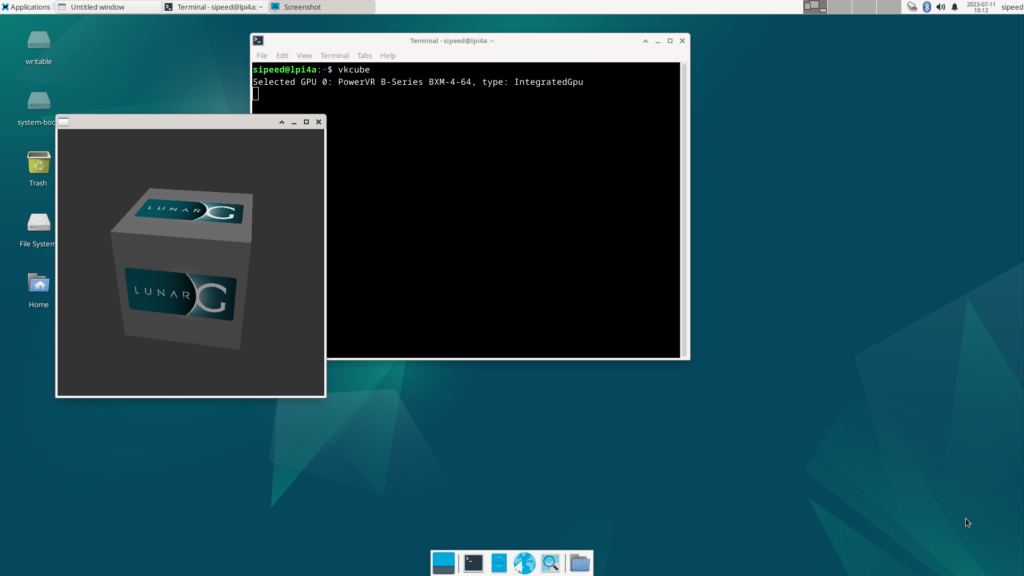
つきまして MAME を Vulkan backend 指定で起動できました。good…!
$ sudo apt install mame
$ mame -window -resolution 800x600 \
    -video bgfx -bgfx_backend vulkan \
    -bgfx_screen_chains unfiltered \
    -bgfx_debug # -rompath ./roms mslug

glmark2-es も 500fps や 600fps といった動作を見せています。(下のスクリーンショットは横でキャプチャなどの操作をしているので本来の値ではないです)
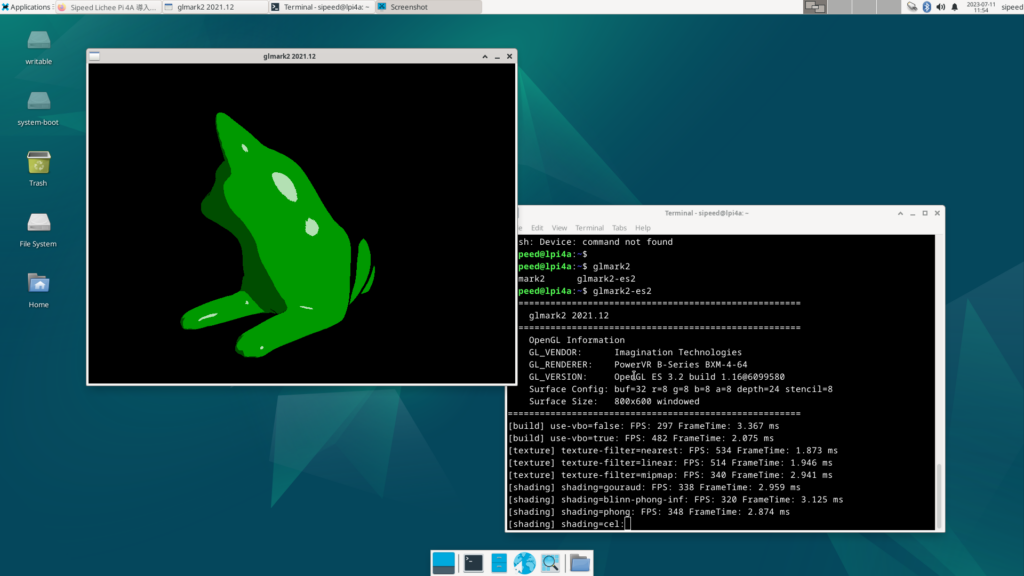
ちなみに GPU 系は revyos-elgs21 package として通常の main とリポジトリが分かれているようです。(mesa を 21 系に落としているようですね)
以下、ToDo メモ:
まだ詳しく見ていないのですが package 外の自前の Vulkan を使うソースをビルドするとイニシャライズに失敗するような気がしました。libvulkan-dev ? こちらの issue と似ていますが後日再検証。
https://github.com/sipeed/LicheePi4A/issues/15
The good news: lichee pi4a has a vulkan driver.
The bad news:vkcubewill refuse to run, due to an assertion failure:
OpenCL については先月 issue が上がっていますが、こちらも未検証です。clinfo はそのまま正しく動作するようになっていました。
https://github.com/sipeed/LicheePi4A/issues/13
I can use OpenCL now, but sadly it segfaults as soon as I enqueue my kernel.
The callstack is of little use. Is there any way that I can get the debug symbols for libPVROCL.so perhaps?
動画エンコード・デコード支援。こちらも後日確認すること。
- https://github.com/revyos/video_memory
- https://github.com/revyos/vpu-vc8000e-kernel
- https://github.com/revyos/vpu-vc8000d-kernel
- https://mirror.iscas.ac.cn/revyos/revyos-gles-21/pool/main/g/gst-omx/
- https://github.com/revyos/th1520-vpu
(2023-07-27 更新)VPU についての詳細な解説が Wiki に追加されていました。
5. GStreamer Player Adaptation Documentation with PTG omxil Library Support
PTG’s OpenMAX IL library (hereinafter referred to as vpu-omxil) enables the LicheePi 4A to smoothly hard-decode 4k 60fps video, so how to use this library? This article will mainly introduce the integration and use of the Parole player on the LicheePi 4A development board, users can follow this article to understand the process of adapting to the LicheePi 4A Take the hard decoding of h264 as an example, the workflow of the hard decoding of the video is shown in the following figure
Ubuntu 22.04 編
公式 Wiki に Ubuntu の文字が見えますので、おそらくそのうちに Ubuntu ベースのイメージもでると思いますが、試しに自分で revyos kernel と kernel module を使って Ubuntu 22.04 を起動してみました。
Ubuntu 22.04 の rootfs としては RISC-V 版 rootfs (Ubuntu Base) の最小構成を使っています。
Ubuntu Base 22.04.2 LTS (Jammy Jellyfish)
ubuntu-base-22.04-base-riscv64.tar.gz
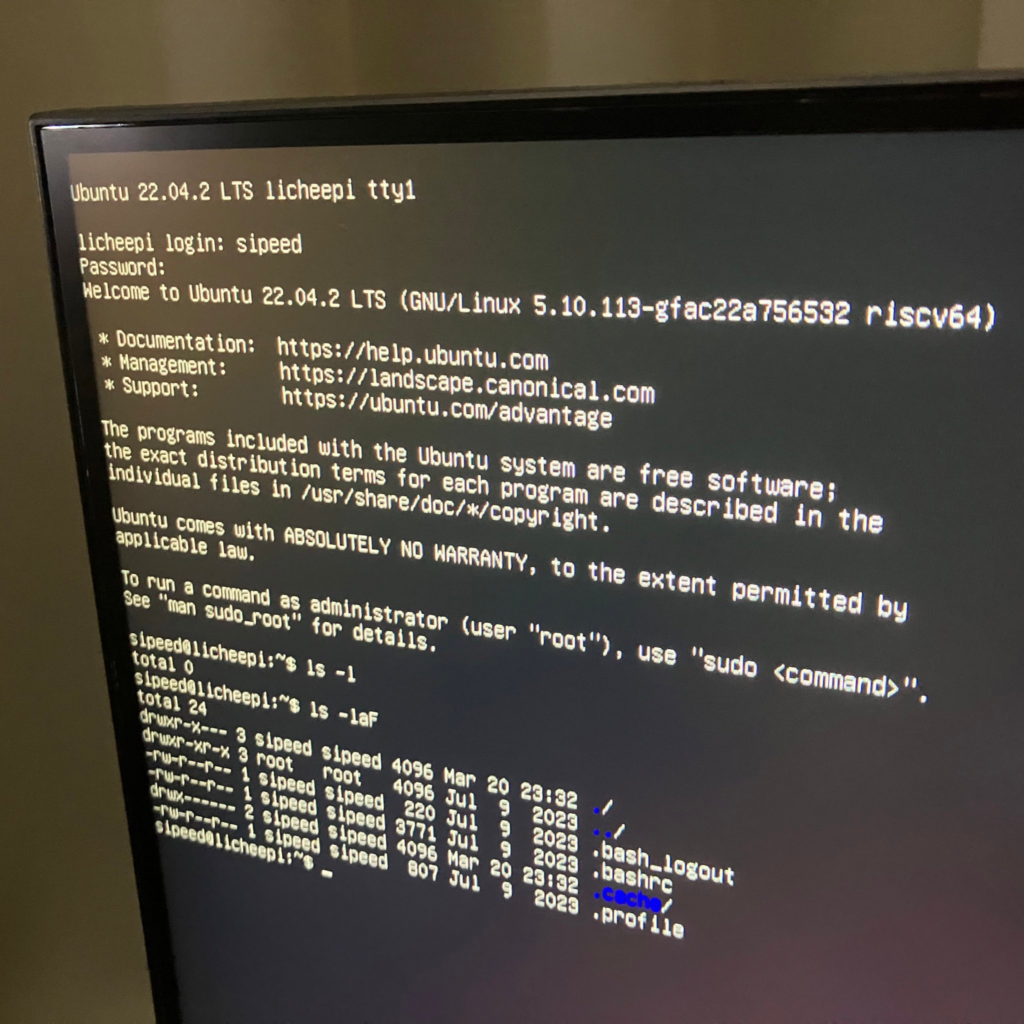
ネットワークや ALSA、USB 機器など、確認した範囲で正しく動作しています。(無線系は未検証です)
残念ながら GDM3 や GNOME を起動するとグラフィックの矩形描画が異常に遅い事象が発生しました。原因は特定できませんでしたが(おそらく OpenGL ES が初期化できないので softpipe 動作)、Ubuntu 22.04 の場合は今の所画面を使わない CUI での利用が良さそうです。(メモ。libGLESv2 – libdrm – mesa – mutter)
ちなみに squashfs ファイルシステムが有効になっていなくて snapd は試せませんでした。今度試すメモ。 ちなみに、以下のカーネルパラメータ追加で snapd が動作することを確認しました。なお riscv64 に対応した snap パッケージはまだ多くはないですので、Snapcraft サイトで arch を確認のこと。
kernel/arch/riscv/configs/revyos_defconfig
CONFIG_SQUASHFS=y
CONFIG_SQUASHFS_XZ=y
CONFIG_SQUASHFS_ZSTD=y
CONFIG_SQUASHFS_LZO=y
スクリーンショットは Ubuntu 20.04 のもの。22.04 でも大丈夫です。
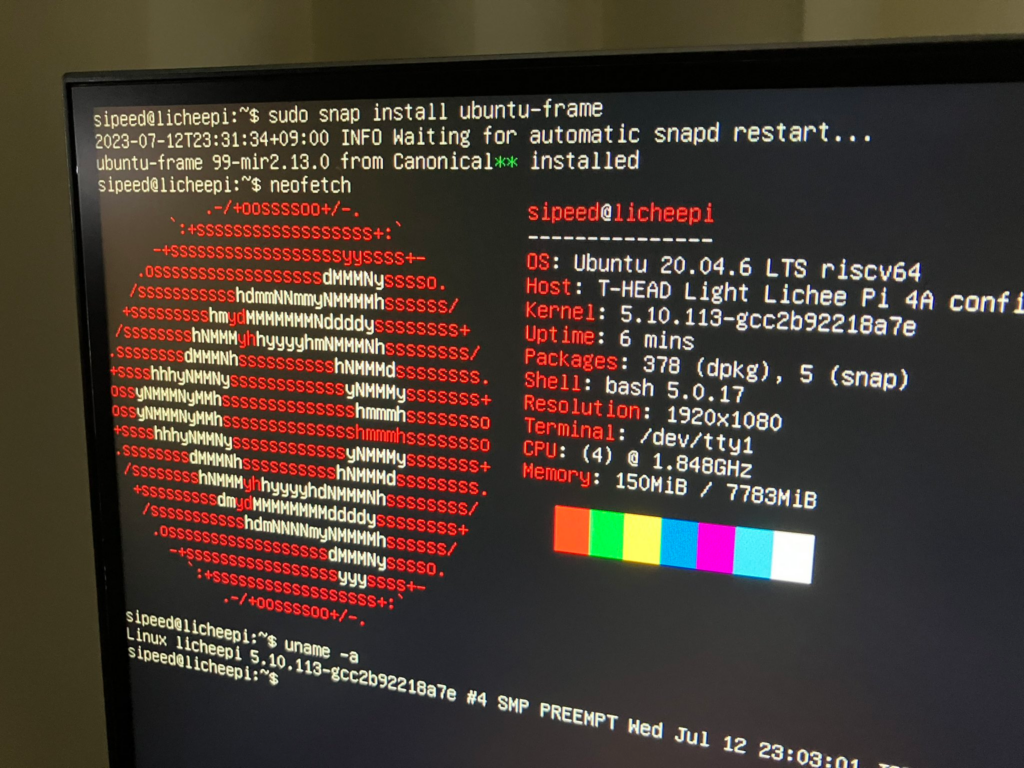
revyos が Debian sid なので Ubuntu 23.10(10月) が動くと嬉しいですね…!
openSUSE Linux
openSUSE も RISC-V 版の rootfs が公開されていますので試しに起動してみました。
Tumbleweed Port Images | openSUSE-Tumbleweed-RISC-V-XFCE.riscv64-rootfs.riscv64-2023.05.15-Build2.15.tar.xz
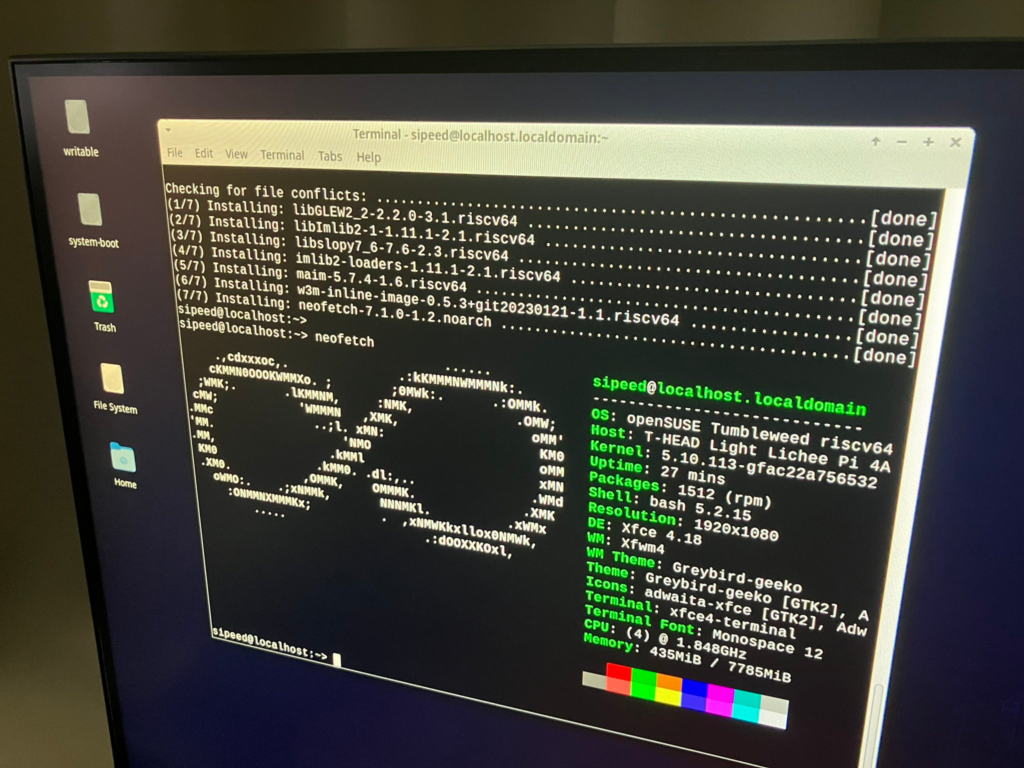
openSUSE は XFCE 版にて GUI も良好な速度で実行できています。(少しマウスカーソルの表示位置がずれているかな?あと RPi 4A よか速く感じます) なお、GNOME 版は起動時に gnome-shell が signal 11 でダウンにて起動できず。
ものは試しで Vulkan や OpenGL ES のバイナリや定義を配置してみましたが、うまくイニシャライズできずでした。
rootfs イメージのつくりかた (openSUSE)
openSUSE の LPi 4A 用の rootfs のつくりかたの例です。
amd64 の普通の(?) Ubuntu 22.04 を使ってイメージ作成の作業をします。(Windows/WSL2 な Ubuntu 22.04 で行う場合の準備はこの記事の下の方に記載しました)
手順中、mount/unmount したり RISC-V 側の root のファイルを上書きしたりするため sudo している箇所があります。うっかりパスの先頭に / をつけてしまうなどして、ホスト側の Ubuntu を壊さないように注意してください。
amd64 Ubuntu 側の準備(RISC-V qemu と systemd を起動する systemd-container を導入)
sudo apt install systemd-container binfmt-support qemu-user-static
amd64 Ubuntu 側に、これからつくる rootfs 用の領域作成:
mkdir work && cd work
# create fs
dd if=/dev/zero of=rootfs-suse-image.ext4 bs=1M count=4096
mkfs.ext4 -b 4096 -L root rootfs-suse-image.ext4
# mount
mkdir rootfs
sudo mount -o loop rootfs-suse-image.ext4 rootfs/
ダウンロードしてきた OS の rootfs (イメージは随時更新されるのでリンク先を確認のこと)を展開、qemu のバイナリ配置:
# openSUSE rootfs ダウンロード
wget https://download.opensuse.org/ports/riscv/tumbleweed/images/openSUSE-Tumbleweed-RISC-V-XFCE.riscv64-rootfs.riscv64-2023.05.15-Build2.17.tar.xz
# ダウンロードしておいたイメージを展開
sudo tar xvf openSUSE-Tumbleweed-RISC-V-XFCE.riscv64-rootfs.riscv64-2023.05.15-Build2.15.tar.xz -C rootfs/
# RISC-V エミュを rootfs に入れる
sudo cp /usr/bin/qemu-riscv64-static rootfs/usr/bin/
# RISC-V として OS をコンテナ起動
sudo systemd-nspawn -D rootfs
ここから qemu 起動した openSUSE の世界 (openSUSE にログインできてない状態でコマンドを実行すると悲劇が起きるのでご注意ください)
# OS パッケージを最新化
sudo zypper dup
# ユーザー作成・パスワード設定(ここでは sipeed に)
useradd -m -u 1001 sipeed
passwd sipeed
# 念の為 openSUSE カーネルのカーネルモジュールを削除
rm -Rf /usr/lib/modules/*
rm -Rf /usr/lib/firmware/*
rm -Rf /boot/*
# Ubuntu の世界に戻る
exit
クリーンアップ:
sudo rm rootfs/usr/bin/qemu-riscv64-static
revyos (rootfs-thead-image-linux_sing.ext4) からカーネルモジュールと `fstab` を抽出して openSUSE に配置:
# revyos image LPI4A_20230706.zip を
# ダウンロード後、展開して
# rootfs-thead-image-linux_sing.ext4 をカレントディレクトリに
# 配置しておくこと。
mkdir revyos
sudo mount -o loop rootfs-thead-image-linux_sing.ext4 revyfs/
# カーネルモジュールコピー(root のファイルがあるので sudo するのに注意)
sudo mkdir -p rootfs/usr/lib/modules/
sudo cp -Rfp revyfs/usr/lib/modules/* rootfs/usr/lib/modules/
sudo cp -Rfp revyfs/usr/lib/firmware/ rootfs/usr/lib/
# fstab コピー
sudo cp -p revyfs/etc/fstab rootfs/etc/
# GPU のバイナリのライブラリ等をコピー(試す場合も、OS 起動確認後で OK なのでここではコメントアウト)
# sudo cp -p revyfs/usr/lib/lib*.so rootfs/lib64/
# sudo cp -p revyfs/usr/lib/lib*.so.1 rootfs/lib64/
# sudo cp -Rfp revyfs/etc/vulcan rootfs/etc/
# sudo cp -Rfp revyfs/etc/OpenCL rootfs/etc/
# できたので umount
sync && sync && sync
sudo umount revyfs
sudo umount rootfs
これにて openSUSE の .ext4 イメージが rootfs-suse-image.ext4 としてできたので、あとは revyos と同じように LPi 4A に flash します。
Linux カーネルは、LPi 4A の RAM が 8GB 版が boot_8gddr.ext4 で 16GB は boot_16gddr.ext4 にしてください。
Lichee Pi 4A の boot ボタンを押しながら amd64 Ubuntu に接続。Windows の方は公式の方法か WSL2 にて認識させて実行。
sudo fastboot flash ram u-boot-with-spl.bin
sudo fastboot reboot
sleep 10
sudo fastboot flash uboot u-boot-with-spl.bin
sudo fastboot flash boot boot_8gddr.ext4
sudo fastboot flash root rootfs-suse-image.ext4
うまく openSUSE が起動したら最後に rootfs のパーティションの拡張を行います。(イメージを 4GB でつくっているため)
$ df -k
Filesystem     1K-blocks     Used Available Use% Mounted on
/dev/root        4046560  1978100   1842364  52% /
...snip...
$ sudo parted -s /dev/mmcblk0 "resizepart 3 -0"
$ sudo resize2fs /dev/mmcblk0p2
$ sudo resize2fs /dev/mmcblk0p3
$ df -k
Filesystem     1K-blocks     Used Available Use% Mounted on
/dev/root        6923792  1978100   4602536  31% /
...snip...
なお、このイメージの openSUSE の root のパスワードは linux です。
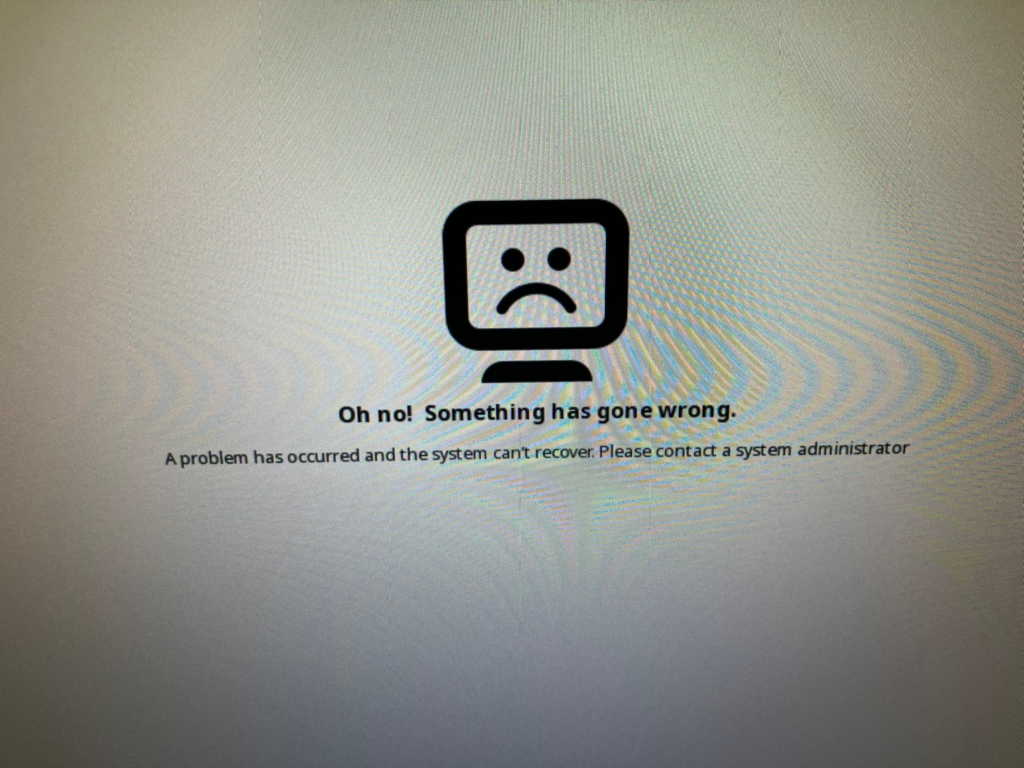
もし以下の「Oh no!」画面でうまく起動しなかったら、ctrl + alt + F2 で tty2 に移動してコンソールから dmesg などを見てください。
rootfs イメージのつくりかた (Ubuntu 22.04.2)
openSUSE の手順と同じ要領で。
amd64 Ubuntu 側の準備(RISC-V qemu と systemd を起動する systemd-container を導入):
sudo apt install systemd-container binfmt-support qemu-user-static
ファイルシステム作成:
mkdir work && cd work
# create fs
dd if=/dev/zero of=rootfs-ubuntu-image.ext4 bs=1M count=4096
mkfs.ext4 -b 4096 -L root rootfs-ubuntu-image.ext4
# mount
mkdir rootfs
sudo mount -o loop rootfs-ubuntu-image.ext4 rootfs/
ダウンロードしてきた OS の rootfs を展開、qemu のバイナリ配置:
# Ubuntu base ダウンロード
wget http://cdimage.ubuntu.com/ubuntu-base/releases/22.04/release/ubuntu-base-22.04.2-base-riscv64.tar.gz
# extract
sudo tar pxf ubuntu-base-22.04.2-base-riscv64.tar.gz -C rootfs
# apt を clean に
echo 'APT::Sandbox::User "root";' | sudo tee rootfs/etc/apt/apt.conf.d/90run-as-root
# RISC-V エミュ配置
sudo cp /usr/bin/qemu-riscv64-static rootfs/usr/bin/
# RISC-V として OS をコンテナ起動
sudo systemd-nspawn -D rootfs
ここから RISC-V Ubuntu 22.04 の世界。(RISC-V Ubuntu 22.04 にログインできてない状態でコマンドを実行すると悲劇が起きるのでご注意ください)
# package update
apt update && apt full-upgrade -y && apt autoremove -y
# create manual
/usr/local/sbin/unminimize
# create user
adduser -u 1000 --gecos debian debian
adduser -u 1001 --gecos sipeed sipeed
usermod -aG adm,cdrom,sudo,dip,plugdev debian
usermod -aG adm,cdrom,sudo,dip,plugdev sipeed
# cli からサウンドと kmsdrm を試したい場合
# usermod -aG audio,video sipeed
# 最小限使える packege 導入
# ちなみに server^ 系を入れると cloud-* 系の systemd 起動に数分時間がかかった
# standard^ までなら数秒で起動します
apt install -y minimal^ standard^
apt install language-pack-ja avahi-daemon
# ネットワーク設定(DHCP)
cat <<EOF > /etc/netplan/01-base.yaml
network:
  ethernets:
    eth0:
      dhcp4: true
  version: 2
EOF
# ネットワークの設定(IPアドレスを固定する場合例)
cat <<EOF > /etc/netplan/01-base.yaml
network:
  ethernets:
    eth0:
      addresses: [172.16.15.20/24]
      nameservers:
        addresses: [172.16.15.1]
      routes:
        - to: default
          via: 172.16.15.1
  version: 2
EOF
# ネットワーク作成
netplan generate
# hostname 設定
echo "licheepi" > /etc/hostname
cat <<EOF >/etc/hosts
127.0.0.1       localhost
127.0.1.1       licheepi
# The following lines are desirable for IPv6 capable hosts
::1     ip6-localhost ip6-loopback
fe00::0 ip6-localnet
ff00::0 ip6-mcastprefix
ff02::1 ip6-allnodes
ff02::2 ip6-allrouters
EOF
# sshd 構成 - パスワード認証 OK
sudo apt install openssh-server
sed -i 's/^#\(PasswordAuthentication\) .*$/\1 yes/' /etc/ssh/sshd_config
# sshd の自動起動はここで設定していないので、実機起動後に次のように enable。
# もしくは後述の systemd を使ったコンテナ起動から設定。
## sudo systemctl enable ssh
# もしもスローダウンする gnome を試す場合(しない場合は以下不要)
sudo apt-get install \
  adwaita-icon-theme-full \
  mutter \
  gdm3 \
  gnome \
  gnome-shell-extension-appindicator \
  gnome-shell-extension-desktop-icons-ng \
  gnome-shell-extension-ubuntu-dock \
  gnome-terminal \
  network-manager-gnome \
  ubuntu-gnome-wallpapers \
  ubuntu-settings
# desktop を入れた場合 Wayland 無効 - WaylandEnable=false
# 初期解像度がおかしくなるため
vi /etc/gdm3/custom.conf
# exit
exit
クリーンアップ:
sudo rm rootfs/etc/apt/apt.conf.d/90run-as-root
sudo rm rootfs/usr/bin/qemu-riscv64-static
revyos (rootfs-thead-image-linux_sing.ext4) からカーネルモジュールと `fstab` を抽出して RISC-V Ubuntu 22.04 に配置:
# revyos image LPI4A_20230706.zip を
# ダウンロード後、展開して
# rootfs-thead-image-linux_sing.ext4 をカレントディレクトリに
# 配置しておくこと。
mkdir revyfs
sudo mount -o loop rootfs-thead-image-linux_sing.ext4 revyfs/
# カーネルモジュールコピー(root のファイルがあるので sudo するのに注意)
sudo mkdir -p rootfs/usr/lib/modules/
sudo cp -Rfp revyfs/usr/lib/modules/* rootfs/usr/lib/modules/
sudo cp -Rfp revyfs/usr/lib/firmware/ rootfs/usr/lib/
# fstab コピー
sudo cp -p revyfs/etc/fstab rootfs/etc/
# GPU のバイナリのライブラリ等をコピー(動作しないのでコメントアウト)
# sudo cp -p revyfs/usr/lib/lib*.so rootfs/usr/lib/
# sudo cp -p revyfs/usr/lib/lib*.so.1 rootfs/usr/lib/
# sudo cp -Rfp revyfs/etc/vulcan rootfs/etc/
# sudo cp -Rfp revyfs/etc/OpenCL rootfs/etc/
# できたので umount
sync && sync && sync
sudo umount revyfs
sudo umount rootfs
あとは openSUSE の手順と同様に、できた rootfs-ubuntu-image を flash して、起動後に rootfs を resize すれば OK と思います。
その他
revyos では、以下の特別な systemd が使われているようです。(今回の rootfs 作成手順にはこれらの systemd 設定を入れていません)
firstboot.service: 初期起動時のファイルシステムのリサイズと sshd-keygen。この記事の手順では手動で resize しているので起動しなくて OK。pvrsrvkm.service: GPU のカーネルモジュールを再ロード?(/usr/share/gpu/insmod.sh を起動しているが失敗している。なんだろう?)rtk-hciattach.service: Realtek H5 bluetooth support。(無線なので)未検証。
├── etc
│   ├── systemd
│       └── system
│           ├── firstboot.service
│           ├── pvrsrvkm.service
│           └── rtk-hciattach.service
├── opt
│   └── firstboot.sh
└── usr
    ├── local
    │   └── bin
    │       ├── hdmi-toggle
    │       └── rtk_hciattach
    └── share
        └── gpu
            ├── insmod.sh
            └── rmmod.sh
hdmi-toggle: 未検証。
$ cat /etc/udev/rules.d/hdmi.rules
SUBSYSTEM=="drm", ACTION=="change", RUN+="/usr/local/bin/hdmi-toggle"
$ cat /etc/udev/rules.d/hdmi_first_hotplug
0
$ cat /usr/local/bin/hdmi-toggle
#!/bin/sh -e

HDMI_STATUS="$(cat /etc/udev/rules.d/hdmi_first_hotplug)"
if [ "${HDMI_STATUS}" = 0 ]; then
        /etc/init.d/lightdm restart
        echo 1 > /etc/udev/rules.d/hdmi_first_hotplug
fi
exit 0
PowerVR 周りについて(2023-07-27 追記)
LPi 4A に搭載されている GPU である PoweVR 周りやライブラリについて調べたメモです。OpenGL ES や Vulkan ユーザーランドドライバーがバイナリーしかなくて途方に暮れていましたが、おそらく今後の開発の進行で(時間はかかると思うものの)問題なくなりそうな雰囲気です。
Open Source GPU Driver – Imagination Developer
Up-streamed user mode driver in Mesa
Initial code towards Vulkan 1.0 driver for Imagination’s Rogue architecture GPUs now available as part of Mesa.Up-streamable kernel mode driver in Linux kernel
Ongoing Process to upstream kernel mode driver to Linux kernel.
- GPU は PowerVR の
BXS-4-64 B-SeriesでB.V.N.Cと呼ばれる内部スペックは36.52.104.182。 - Linux の kernel module についてはベンダーの Imagination Technologies 社から open sourceで提供されており、revyos kernel には導入済み。
- これまで Linux PowerVR のユーザーランド OpenGL ES や Vulkan ドライバーは長らくバイナリのみ提供されていたか closed source だったようです。 revyos ではこれらがセットアップされ正しく動作します。(thead-gles-addons パッケージ)
- これらのバイナリは mesa の 21 系の API や loader、パッチによりロード・実行されるようになっています。meta-riscv/recipes-graphics/mesa/mesa-pvr
(ちなみに Ubuntu 22.04 の mesa は 22.2.5 で次は 23系) - 以下、参考になる記事。VisionFive 2 JH7110 のディストリビューションについてですが、おそらく LPi 4A BXS-4-64 も同構成だと思います。
https://github.com/shirok1/vf2-note/blob/master/gpu.md
libGLESv2_PVR_MESA.so: 对 OpenGL ES 2/3 的专有实现?
- Imagination Technologies は Mesa Project に Vulkan open source driver を絶賛コミット中です。以下 Mesa のソースより。(現在のところ
BXS-4-64 B-Seriesの名前は見えますがB.V.N.C名はLPi 4A のものとは少し異なるようです)
$ cat mesa/docs/drivers/powervr.rst
PowerVR is a Vulkan driver for Imagination Technologies PowerVR GPUs, starting
with those based on the Rogue architecture.

The driver is **not yet fully conformant** so it requires exporting
``PVR_I_WANT_A_BROKEN_VULKAN_DRIVER=1`` to the environment before running any
Vulkan content.

The following hardware is currently in active development:

========= =========== ============== ======= ==========
Product   Series      B.V.N.C        Vulkan  Conformant
========= =========== ============== ======= ==========
GX6250    Series 6XT  4.40.2.51      1.0     No
AXE-1-16M A-Series    33.15.11.3     1.0     No
BXS-4-64  B-Series    36.53.104.796  1.0     No
========= =========== ============== ======= ==========
...snip...
$ grep pvr: mesa/docs/relnotes/*
22.1.0.rst:- pvr: Add a Vulkan driver for Imagination Technologies PowerVR Rogue GPUs
...snip...
...snip...
23.1.0.rst:- pvr: Amend definitions for ST and IDF
23.1.0.rst:- pvr: Add encodings for index registers
23.1.4.rst:- pvr: skip setting up SPM consts buffer when no const shared regs are used
23.1.4.rst:- pvr: Fix seg fault on empty descriptor set
23.1.4.rst:- pvr: Fix dynamic offset patching
23.1.4.rst:- pvr: Fix barrier insertion on merged subpasses
- (Wayland などの動作に必要であろう)OpenGL はというと Mesa の Zink driver(OpenGL を Vulkan に変換して動作させる)で動作させる方針のようです。以下、2023-07 の記事です。
Imagination GPUs now support OpenGL® 4.6 – blog.imaginationtech.com
Support has been achieved by working alongside the open-source specialists at Collabora. Zink is a layered OpenGL® implementation, part of the open-source Mesa project, that allows OpenGL® 4.6 content to run on top of a native Vulkan driver.
Imagination GPUs With PVR Vulkan + Zink Working Well For OpenGL 4.6– www.phoronix.com/news
We’ve known since last year when Imagination published their open-source PowerVR Vulkan driver that they’d be focusing on a Vulkan hardware driver only and using the likes of the Zink compatibility layer for OpenGL support. Today Imagination formally announced OpenGL 4.6 for their GPUs via Zink.
というわけで、未検証ですが新しい Mesa のバージョンを持つディストリビューションで PowerVR Vulkan open source driver が動作すれば Zink driver 経由で OpenGL が動作するかもしれません。
Mesa Zink OpenGL – PowerVR Vulkan 起動方法メモ:(未検証・予想)
PVR_I_WANT_A_BROKEN_VULKAN_DRIVER=1 __GLX_VENDOR_LIBRARY_NAME=mesa MESA_LOADER_DRIVER_OVERRIDE=zink GALLIUM_DRIVER=zink glxinfo
最後に自分がよく分かっていない部分メモ。Linux カーネル側の PowerVR ドライバーについては 2種類あり、書き直されているようす(Mesa にコミットが入っているのは img-rogue ではなく imagination と組み合わせるはず)
- drivers/gpu/drm/img-rogue – src/imagination/vulkan/winsys/pvrsrvkm/
- drivers/gpu/drm/imagination – src/imagination/vulkan/winsys/powervr/
MESA 23.0.4 の src/imagination/vulkan/winsys/powervr/pvr_drm.c
struct pvr_winsys *pvr_drm_winsys_create(int master_fd,
                                         int render_fd,
                                         const VkAllocationCallbacks *alloc)
{
   pvr_finishme("Add implementation once powervr UAPI is stable.");

   return NULL;
}
Imagination Tech Posts Updated PowerVR Linux DRM Driver
Imagination Technologies has posted the fifth iteration of their driver patches for supporting PowerVR Rogue graphics with an open-source Linux kernel Direct Rendering Manager (DRM) driver that will go along with their Mesa PVR Vulkan driver.
ちなみに revyos kernel pvrdrmsvr の /dev/dri を覗いてみた様子。img,gpu という名称で申告される。
max_drm_devices: 3
0, drm_devices[i]->bustype: 2
 drm_render_device->nodes[DRM_NODE_PRIMARY]: /dev/dri/card2
 drm_render_device->nodes[DRM_NODE_RENDER]: /dev/dri/renderD129
 compat: img,gpu
1, drm_devices[i]->bustype: 2
 drm_render_device->nodes[DRM_NODE_PRIMARY]: /dev/dri/card1
 drm_render_device->nodes[DRM_NODE_RENDER]: /dev/dri/renderD128
 compat: thead,c910-gc620
2, drm_devices[i]->bustype: 2
 drm_render_device->nodes[DRM_NODE_PRIMARY]: /dev/dri/card0
 drm_render_device->nodes[DRM_NODE_RENDER]:
 compat: verisilicon,display-subsystem
Windows/WSL2 Ubuntu 22.04 上で riscv64 systemd-container を起動
Windows の方は WSL2 Ubuntu 22.04 で rootfs の作成を実施するのが便利です。若干、追加の設定が要ります。手順 1-3 までを実施します。
(手順1)とりあえず WSL2/Ubuntu 22.04 にパッケージをインストール。
sudo apt install systemd-container binfmt-support qemu-user-static
(手順2)WSL2 の [boot] systemd=true を有効にして、この後 wsl --shutdown などで再起動。
$ sudo vi /etc/wsl.conf
[user]
default=hiromasa
[boot]
systemd=true
(メモ)コンテナ起動するも riscv64 のバイナリがうまく qemu-riscv64-static に渡っていなそうな雰囲気。
# RISC-V エミュを rootfs に入れる
$ sudo cp /usr/bin/qemu-riscv64-static rootfs/usr/bin/
# riscv64 systemd な Linux 起動
$ sudo systemd-nspawn -D rootfs
Spawning container rootfs on /home/hiromasa/devel/riscv/lip4a/revyos-build/create/rootfs.
Press ^] three times within 1s to kill container.
execv(/bin/bash, /bin/sh) failed: Exec format error
Container rootfs failed with error code 1.
(メモ)qemu-riscv64 が見当たらない。
$ update-binfmts --display
llvm-14-runtime.binfmt (enabled):
     package = llvm-14-runtime
        type = magic
      offset = 0
       magic = BC
        mask =
 interpreter = /usr/bin/lli-14
    detector =
python3.10 (enabled):
     package = python3.10
        type = magic
      offset = 0
       magic = \x6f\x0d\x0d\x0a
        mask =
 interpreter = /usr/bin/python3.10
    detector =
(手順3)riscv64 の定義はあるが import されていないのでインポート。(aarch64 などの場合も同様に /usr/share/binfmts 内で定義を探して import)
$ ls -laF  /usr/share/binfmts | grep riscv
-rw-r--r--   1 root root   305  6月 13 20:33 qemu-riscv32
-rw-r--r--   1 root root   305  6月 13 20:33 qemu-riscv64
$ sudo update-binfmts --import qemu-riscv64
$ update-binfmts --display
...snip...
qemu-riscv64 (enabled):
     package = qemu-user-static
        type = magic
      offset = 0
       magic = \x7f\x45\x4c\x46\x02\x01\x01\x00\x00\x00\x00\x00\x00\x00\x00\x00\x02\x00\xf3\x00
        mask = \xff\xff\xff\xff\xff\xff\xff\x00\xff\xff\xff\xff\xff\xff\xff\xff\xfe\xff\xff\xff
 interpreter = /usr/libexec/qemu-binfmt/riscv64-binfmt-P
    detector =
(メモ)これで WSL2 でも riscv64 の rootfs を起動できます。
$ sudo systemd-nspawn -D rootfs/
Spawning container rootfs on /home/hiromasa/devel/riscv/lip4a/revyos-build/create/rootfs.
Press ^] three times within 1s to kill container.
root@rootfs:~#
# neofetch
OS: Ubuntu 22.04.2 on Windows 10 riscv64

ちなみに ThinkPad の生 Ubuntu 22.04 では import は不要でした。直接原因は未調査です(導入順?)。
systemd-nspawn の起動が failed: Exec format error になった場合はお試しください。
systemd-nspawn のコンテナを systemd ブートする場合
rootfs にマウントした RISC-V の OS を systemd ブートしたい場合は次のように -b オプションを付与します。このことにより初期設定で入れた systemd が実際に動作するようになります。
$ sudo systemd-nspawn -b -D rootfs
...snip...
Ubuntu 22.04.2 LTS localhost.localdomain console
localhost login: sipeed
Password:
Welcome to Ubuntu 22.04.2 LTS (GNU/Linux 5.15.90.1-microsoft-standard-WSL2 riscv64)
$ sudo shutdown
[sudo] password for sipeed:
...snip...
Shutdown scheduled for Fri 2023-07-14 18:12:52 JST, use 'shutdown -c' to cancel.
なお、rootfs が Ubuntu 22.04 や 20.04 の場合で systemd コンフィグレーション後に DNS を引きたい場合は次のファイルを修正して -b ブートすれば OK です。
$ sudo vi /etc/systemd/resolved.conf
[Resolve]
DNS=192.168.0.1 # や 1.1.1.1 など
systemd 起動のログインを終了するには、コンテナをシャットダウンします。
$ hostname # shutdown 先を間違えないよう…
licheepi
$ sudo shutdonw -h now
(メモ)Ubuntu のいくつかのセットアップ後に systemd 起動すると、ログイン後から bash 起動までに次のプロセスの処理に時間がかかるケースがあるようです。2分くらいすると起動します。
/usr/libexec/qemu-binfmt/riscv64-binfmt-P /bin/systemctl /bin/systemctl --user set-environment DBUS_SESSION_BUS_ADDRESS=unix:path=/run/user/1001/bus
(メモ)たとえばコンテナ内でクロスコンパイルをしたい場合など dbus を使わない場合は次のように dbus を mask して無効にすればスムーズに起動します。
$ sudo systemctl disable dsub
$ sudo systemctl mask dsub
# revert back
# sudo systemctl enable dsub
# sudo systemctl unmask dsub
(メモ)なお、本題と外れますが、ユーザ名を指定して systemd を介さずに直接起動する場合は次のように -u で指定します。ブートしていないので exit で抜けられて便利です。ネットワークを使わない場合はこちらがいいでしょう。
$ sudo systemd-nspawn -u sipeed -D rootfs
# 終わり…!
$ exit
WSL2 で systemd を構成後 WSL2 から VS Code などの Windows 側の .exe の起動ができない
systemd-binfmt.service を構成すると VS Code などの起動が以下のように Exec format error エラーになることがあります。(自分も設定後どこかのタイミングから発生しました)
/mnt/c/Users/hiromasa/AppData/Local/Programs/Microsoft VS Code/Code.exe Exec format error
Windows 側の .exe であることを Linux が認識できずに起動できなくなっているということのようです。
https://github.com/microsoft/WSL/issues/8952
https://github.com/microsoft/WSL/issues/8843#issuecomment-1459120198
issue にあるように以下のように binfmt に定義を入れて WSL2 を再起動すると解消されます。
sudo sh -c 'echo :WSLInterop:M::MZ::/init:PF > /usr/lib/binfmt.d/WSLInterop.conf'
参考記事
Ubuntu 22.04 Base の導入で非常に参考になりました。
VisionFive 2でriscv64なUbuntuを動かす
第752回ではStarFiveのRISC-Vボードである「VisionFive 2」について紹介し、初期ファームウェアのアップグレード方法と、StarFiveが提供するDebianイメージをインストールする方法を紹介しました。今回はこれをUbuntu化してみましょう。
LPi 4A にさまざまな Linux を導入している記事。こちらも非常に参考になりました。感謝。
约莫去年,折腾一段时间 StarFive RISC-V 开发板,后因工作繁忙,停滞半年有余。去年底、今年初吧,RISC-V 开发板如雨后春笋般冒出来。前不久,吴老师非常慷慨的赠予我一块最新的 Sipeed LicheePi 4A 开发板,于是,家里又有好玩的玩具了。