以前から WebAssembly を使ってレトロシンセ音源をエミュレートしてブラウザーで発声させてみたいと思っていたのですが、Rust が WebAssembly に直接コンパイルできるようになったのをきっかけに挑戦し、なんとか動かすことができました。
以下からデモを見ることができます。 🙂
WebAssembly 非対応の IE を除く、PC とモバイルのほとんどのブラウザーで動作すると思います。(なお、iOS 11 Safari と Android Chrome はサンプリングレートを無視してしまう処理があるようで高め・速めで再生されています。iOS 12 Safari では修正されたようです。)

ソースコードも github にコミットしました。
https://github.com/h1romas4/rust-synth-emulation
PSG(SN76489) VGM player by Rust
さて、初めての Rust だったこともあり製作に結構時間がかかりましたので顛末でも…。
何はなくとも Rust 言語を覚えなければということで、ちょうどオライリーから「プログラミング言語 Rust」が発売されたので購入。

読み進めるも若干飛ばし気味に進む展開に、まだ早かった…と先に公式ドキュメント版プログラミング言語 Rust を読みました。
プログラミング言語Rust: 2nd Edition”の日本語版PDFを作成した
プログラミング言語Rust: 2nd Editionの日本語版PDFを公開しました!
550ページ以上の素晴らしい翻訳と組版で本当に感謝しかありません…。2週間ほどかかりましたが最後まで通して読むことができました(オライリーは少しできるようになってから読んだほうがいいかもしれません)
合わせて、海外のハッカーさんが Rust でライブコーディングしている youtube 動画を見ながらプログラムの組み立て方などを覚えています。こちらも非常に参考になりました。
そんなこんなで半月ほどかけて、C 言語でかかれた SN76498(PSG)エミュレーターを Rust に移植し、PCM サンプリングファイルを出力させることに成功。 🙂
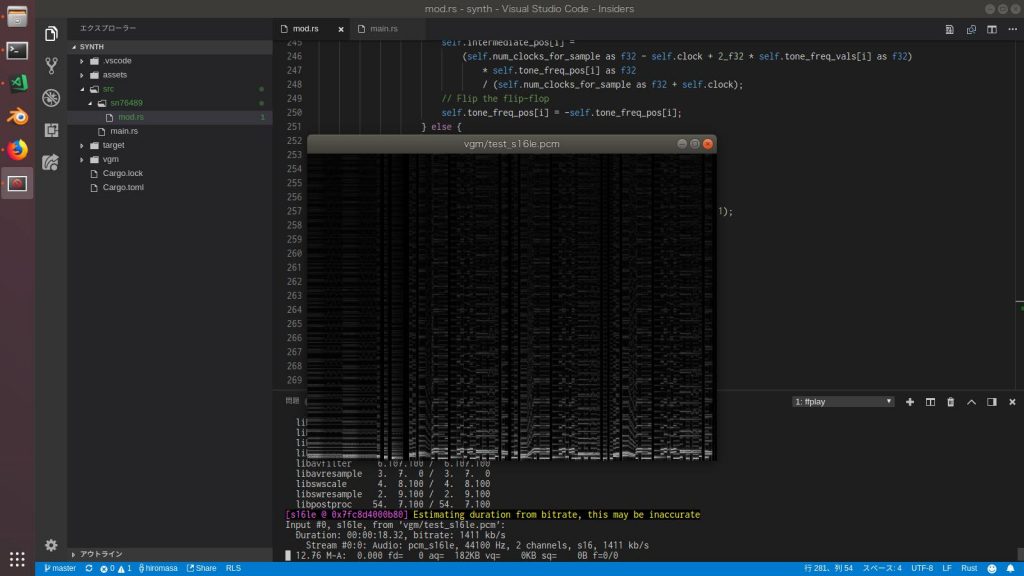
このプログラムを元に WebAssembly 化していきました。
Rust 側での状態の保持
WebAssembly は JavaScript と WebAssembly 間で関数を公開し、互いに呼び出すことができますが、WebAssembly(Rust)側で状態を保持したいことがあります。
今回のプログラムの構成は JavaScript 側で AudioContext イベントを回し、発声バッファが必要になったタイミングで Rust 側で PSG をエミュレーションし 2048 サンプルごとに渡すようなロジックになっていますが、Rust 側では楽曲のどこまで再生したかなどなどを覚えている必要があります。
保持したいデーターをつめた Rust 側の構造体は次のようにしました。
struct VgmPlay { sn76489: SN76489, vgmpos: usize, remain_frame_size: usize, vgmend: bool, buffer: [f32; MAX_BUFFRE_SIZE], vgmdata: [u8; 65536] }
C言語であれば static にしておけば OK ですが、Rust の static は実行前に大きさが決まっていないとコンパイルエラーとなるため、lazy_static! マクロを用いて Mutex 内にこの構造体を保持しています。
lazy_static! { static ref DATA: Mutex<VgmPlay> = Mutex::new(VgmPlay::from()); }
JavaScript に公開する関数では Mutex をロックした上で中の構造体を取得し、構造体に impl した関数を呼び出します。
#[no_mangle] pub unsafe extern "C" fn play() -> f32 { let vgmplay = &mut DATA.lock().unwrap(); vgmplay.play() as f32 }
ブラウザに実装された JavaScript はシングルスレッドであるため、関数に再入がかかったり同じ構造体を使う別な関数が呼び出されることはありませんが、Mutex につめておくと安心ですね。 このあたりは次の記事が大変参考になりました。
Rocket – A Rust game running on WASM Technically, this isn’t necessary in the case of Javascript, since there will only be one thread. Still, the type system knows nothing about that… Hence the mutex.
感謝。
メモリーの共有
JavaScript/WebAssembly 間でメモリーのポインタを共有をすることができます。今回はサンプリングバッファを割当て、Rust 側で PSG をレンダリングしたメモリーをそのまま JavaScript からアクセスして AudioContext に書き込むことで発声させています。
Rust 側でメモリーの位置を返却。
#[no_mangle] pub unsafe extern "C" fn get_audio_buffer() -> *const f32 { let vgmplay = &mut DATA.lock().unwrap(); &(vgmplay.buffer[0]) }
JavaScript 側で ArrayBuffer としてアクセス。
wasm_audio_buffer = new Float32Array( wasm_memory.buffer, wasm_exports.get_audio_buffer(), SAMPLE_LENGTH); // ... ev.outputBuffer.getChannelData(0).set(wasm_audio_buffer);
また、楽曲データーである .vgm ファイルを http して Rust のメモリーに格納することもしています。
Rust で上記のサンプリングバッファ同様 vgm_data のポインタを関数で公開した上で JavaScript 側から fetch した値を Uint8Array として set。
wasm_vgm_data = new Uint8Array( wasm_memory.buffer, wasm_exports.get_vgm_data(), MAX_VGM_DATA); // load vgm data fetch('./vgm/vgmsample.vgm') .then(response => response.arrayBuffer()) .then(bytes => wasm_vgm_data.set(new Uint8Array(bytes))) .then(results => { // ... });
JavaScript/WebAssembly でメモリーが共有できるため、余分なコピーが発生せず高速に処理することができました。今回は実装していませんが、Rust 側でサンプリングをフーリエ変換してフレームバッファメモリーにビジュアライズして書き込み、canvas に転送なんてこともできると思います。(Web Audio API にも FFT がありますが :D)
Web Audio API
WebAssembly だけの話ってわけでもないのですが、ブラウザの Web Audio API の使い方にちょっと困りました。
Rust 側としてはサンプリングを全て再生したタイミングで次のサンプリングを送り込みたいのですがそれを Rust 側で知るすべがなかったため、JavaScript 側の AudioContext の onaudioprocess イベントを使い(バッファを吐ききると発動する) Rust 側からサンプリングを渡す方式としています。
残念ながら現在 onaudioprocess イベントは JavaScript のメインスレッドを使いきる可能性があるということで非推奨となっており、Audio Workers を使えということのようです。
Audio Workers Audio workers を利用すると web worker のコンテキストで音声処理をおこなえます。Audio Workers は比較的新しいいくつかのインタフェース (2014 年 8 月 29 日に定義)によって定義されているため、これを実装したブラウザはまだありません。実装が完了すると、
ScriptProcessorNode, と JavaScript による音声処理 で述べた機能を置き換えることとなります。
が、まだ実装が進んでいないようです…。 とりあえず今のところ WebAssembly では、JavaScript のタイマーやイベントを契機に処理するという流れが良いかと感じました。
(追記:Audio Worker は仕様から消えて AudioWorklet になったようです)
(2022/8追記 AudioWorklet を使ってつくり直した実装は以下にあります)
というわけで、なんとなく WebAssembly でのプログラムの形がつかめてきました。 Rust も少しだけ分かってきましたのでまた何かつくってみようと思います。
WebAssembly はブラウザベンダー4社でつくってるだけあり、互換性もよく(今回 WebAssembly 的には何のトラブルもなく全てのブラウザで動作しました)、次のステップでは GC やスレッドも入ってくるということなので楽しみな技術です。
ついにブラウザーで好きなプログラムを動作させることができるようになって嬉しいす。 😀
