2019/09/26 update (本記事は Eclipse Che 6 についてです)
Eclipse Che 7 がリリースされ、Gradle サポートも加わりましたので本記事の内容は古くなっています。 Eclipse Che 7 では、Java Language Server が build.gradle を評価することができるため、Gradle プロジェクトをそのまま読み込むことができるようになりました!
―――
ブラウザ版 Eclipse である Eclipse Che は、Docker を活用しさまざまな言語の開発環境をクリックひとつで構築でき、ブラウザから操作できる利点と合わせ「どこでも開発」が実現できるんじゃないかと思わせる、現在も活発に開発が進んでいる期待のプロジェクトです。 😀
今回、Eclipse Che の Saas である Codenvy を使って Spring Boot + Gradle ウェブプロジェクトを動作させるケースで、ハマりポイントや手間が結構ありましたので設定を記載したいと思います。
現在 Eclipse Che 上で Spring Boot + Gradle を動かそうとすると、いくつかの問題点があります。
- Gradle (build.gradle) を解釈してくれないないため、ソースやクラスパスを通すことができない。 Eclipse でいうところの buildship 相当の実装がまだされていない。
- IDE にインクリメンタルビルドが実装されてない(ですよね?)ため、Spring Boot DevTool のリロード機能を使うことができない。
- Codenvy のリソースの問題か、ブラウザ上で動作する JS の問題か、結構フリーズする…
最後の問題はさておき、上の 2点は gradle を駆使してなんとかすることができましたので、Codenvy のログイン後からの手順を書いてみます。
Workspace の作成
プロジェクトを動作させるためのワークスペースを作成します。左メニュー Workspaces から Add を押下します。

SELECT STACK のフィルターで All を選択し、検索文字列に java debian を入力し “Java Debian” スタックを選択します。(2018/06/09 時点で CentOS を使っている Docker イメージを選択すると Workspace 開始がエラーになりましたので Debian にしています)
また、マシンのメモリーはデフォルト 2G になっていますが、3G まで無料で使えるようなので上げてしまってもいいかもしれません。
次に Spring Boot + Gradle (gradlew 入り)のソースコードを git から取得するため Add Project に git の Repository を指定します。
ここではサンプルで自分が公開している Spring Boot + Vue.js + Gradle + webpack のテンプレートプロジェクトを指定しています。
https://github.com/h1romas4/springboot-template-web.git
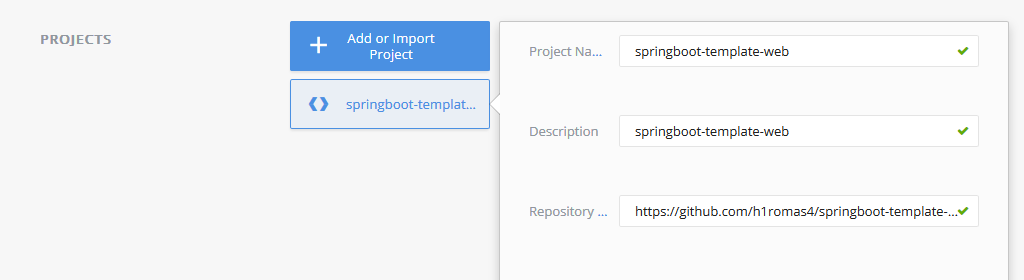
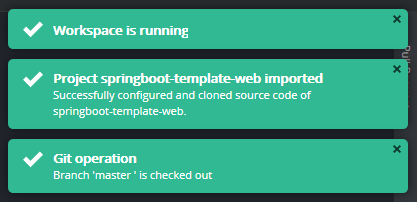
保存したら Create ボタンを押下してワークスペースを作成します。作成後、画面がワークスペースに遷移し Docker で環境が構築され起動し、git からリポジトリーからソースコードが取り込まれます。
build.gradle を修正し pom.xml を生成する
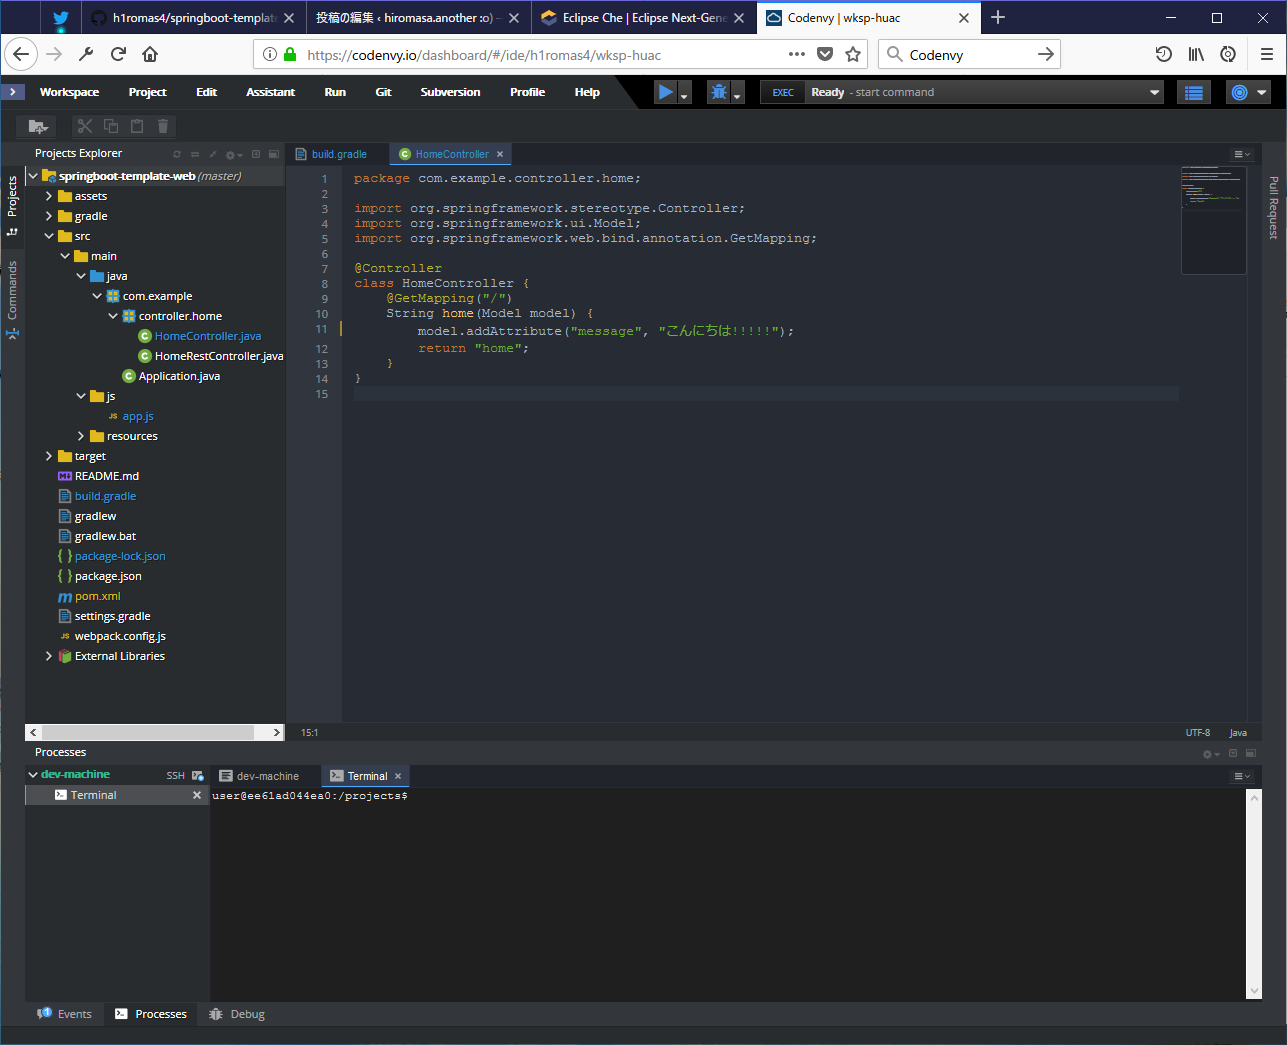
Eclipse Che は現在 build.gradle を認識できないため、このままであると .java はただのテキストファイル扱いで補完などができません。これを解決するため、Eclipse Che が扱える Maven の pom.xml を生成します。
Gradle に pom.xml を生成するプラグインがありますので、プロジェクトの build.gradle を次のように修正します。
maven プラグインを追加。(と maven プラグインが要求するため groud, version を追加)
plugins {
    id 'java'
    id 'eclipse'
    id 'maven'
    id 'com.moowork.node' version '1.2.0'
    id 'org.springframework.boot' version '1.5.9.RELEASE'
}

group = 'com.example'
version = '1.0-SNAPSHOT'
次に、dependencies に使うバージョンを追記します。(Gradle の Spring Boot プラグインは指定したプラグインのバージョンから、依存関係のライブラリバージョンも自動で認識してくれますが、Maven プラグインからは参照できないため)
また合わせて、gradle build 時に pom.xml が自動的に生成されるようにタスクを追加します。(task createPom 以降)
dependencies {
    compile('org.springframework.boot:spring-boot-starter-web:1.5.9.RELEASE')
    compile('org.thymeleaf:thymeleaf-spring4:3.0.2.RELEASE')
    compile("org.springframework.boot:spring-boot-devtools:1.5.9.RELEASE")
}

task createPom {
    description "Generates a pom.xml in the project root directory; useful e.g. for IDEs which can read POM but don't directly support Gradle."
    doLast {
        pom {
        }.writeTo("pom.xml")
    }
}

compileJava.dependsOn createPom
build.gradle の修正が終わったら、画面下部の Terminal から次のコマンドを入力し初期ビルドします。
$ cd springboot-template-web/
$ ./gradlew build
$ mvn package
$ ./gradlew build
mvn package の後に再度 ./gradlew build しているのは”おまじない”です。(pom.xml に刺激を与えることで Eclipse Che が Maven プロジェクトとして認識してくれるようです。この手順を確立するまでハマりました。。)
Eclipse Che が pom.xml を認識するとプロジェクトのツリーに External Libraries として無事 dependencies が入るはずです。
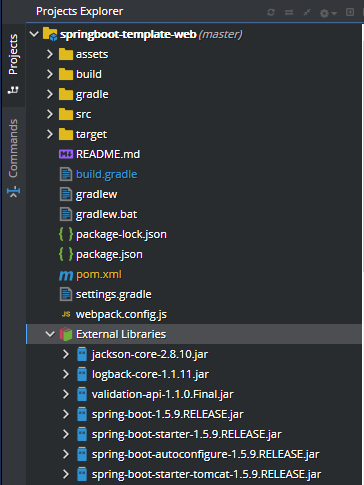
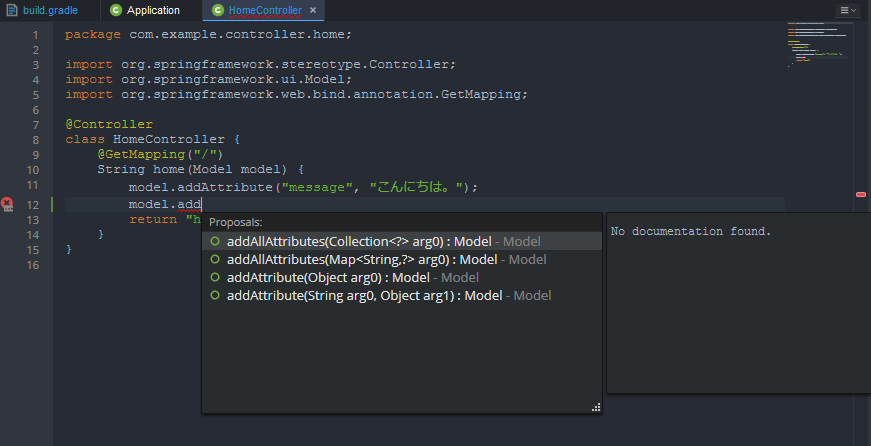
.java も Java ソースファイルとして扱ってくれ、補完なども効くようになります。
アプリケーションの起動
Spring Boot のウェブアプリケーションを起動するために実行構成を作成します。

Create new command から bootRun タスクを次のように作成します。
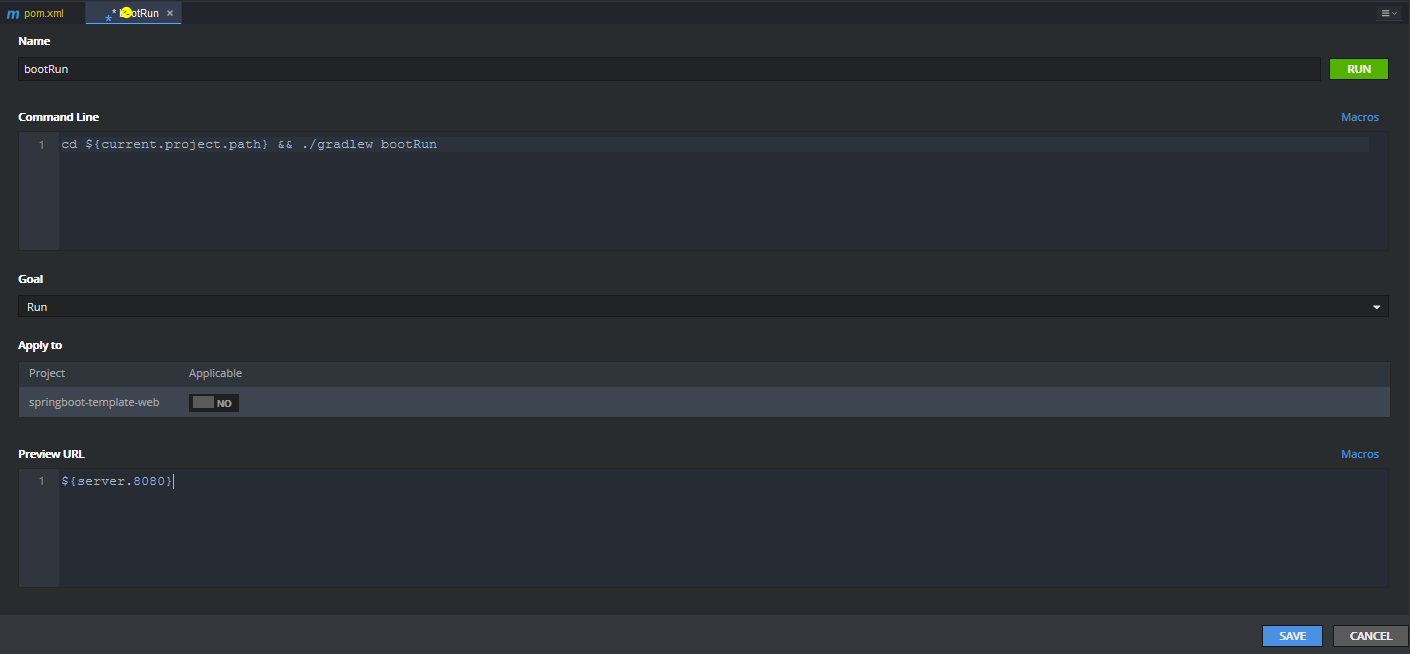
Command Line
cd ${current.project.path} && ./gradlew bootRunPreview URL
${server.8080}なお、それぞれの入力部分はマルチラインになっていますが、必ず 1行で書いてください。空行でも改行コードが混在すると Windows(のブラウザ)では動かなくなります。どうやら LF スプリットしているらしく Linux なら動作してしまうという…(ハマり2)
Save 後 RUN ボタンでアプリケーションが起動します。
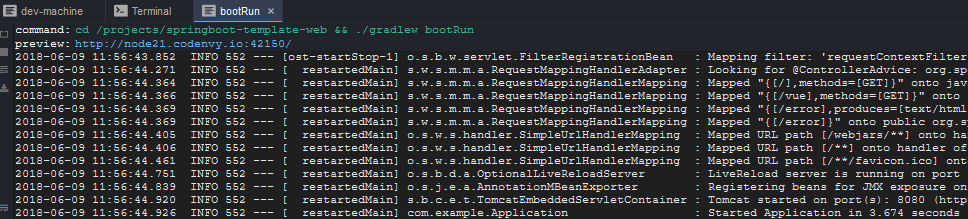
タスクのビューの preview: 欄にある URL をクリックするとポート 8080 で起動したアプリケーションにブラウザから接続でき、実行を確認することができます。
なお、アプリの停止は画面上部右の「■」から行えます。

インクリメンタルビルドとリロード
この Spring Boot プロジェクトには Spring DevTool の依存関係が入っており、Eclipse ではソースを修正すると自動的にアプリケーションが再起動し、ビルドアンド確認が簡単にできるように設定されています。
残念ながら Eclipse Che はソース修正後に自動的にコンパイルは走らないようなので、bootRun しているとは別の gradle を使って、ウォッチとインクリメンタルビルドをしてあげます。
Terminal から次のコマンドを入力します。
./gradlew build --continuous
これでファイルウォッチに入りますので、.java ファイル修正でアプリケーションが自動的に再起動されるはずです。(停止は Ctrl + d です)
webpack ビルド
このプロジェクトは webpack/nodejs のビルドを使い、JavaScript を ES2015 としたり CommonJS を取り入れたりしています。 nodejs のランタイムは Gradle のプラグインにより自動的にダウンロードされるようになっていますので、上部メニューの Run から Terminal で新しいターミナルを開き次のコマンドを入力するとビルドがかかります。
./gradlew webpack
また、JavaScript の修正からの自動ビルドをするには次のコマンドを入力するとウォッチモードに入ります。
./gradlew watch
詳しくは「フロントエンド技術を導入した Java ウェブアプリケーション開発」をご覧ください。
さて、Eclipse Che にて .js を開くと…
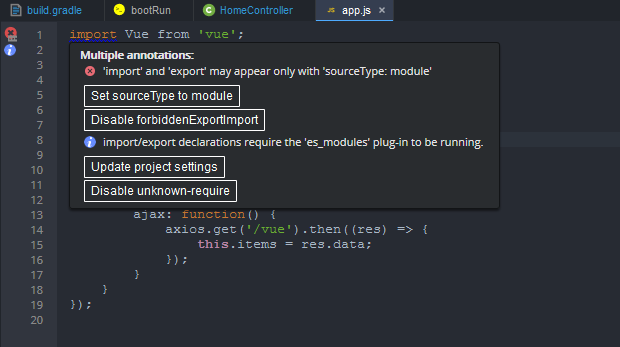
おっ(ΦдΦ)!!という感じになりましたが、自分の環境ではこの後ブラウザが何度やってもフリーズしてしまいました。。いい感じに動きそうなだけに、無念。。
最後に
実際に Codenvy で Eclipse Che を使ってみるとフリーズも多くまだまだこれからといった印象ですが、今後はエディタ部が Eclipse Orion ベースのものから VS Code でおなじみ Monaco Editor になるなど改良が進んでいくようです。
個人的にはブラウザから使うより、Eclipse Che の REST API を活用して任意のクライアントから Docker 環境や language-server に接続できる方向にも発展してくれると嬉しいですが、継続してウォッチしていきたいと思います。
とりあえず、本手順でいろいろ検証できると思いますので、余暇にでもお試しください。 🙂